Build Your First AI Agent with viaSocket | A Step by Step Guide
Are you tired of automation workflows that can only follow rigid, predefined paths?
What if you could create an AI assistant that adapts to different situations and makes intelligent decisions on its own? Imagine automating tasks that not only follow instructions but also learn and improve based on the data they receive.
Traditional automation workflows are great for simple tasks, but they often fall short when it comes to handling complex scenarios or dynamic decision-making.
This is where AI agents come in, offering a new level of automation that can think on its feet and evolve over time.
With the latest advancements in AI-powered automation, you can now build intelligent workflows that adapt to changing conditions, learn from user interactions, and make smarter decisions. The best part? You don't need to write a single line of code to get started.
In this guide, we’ll walk you through how you can create your own AI agent, one that can handle tasks, learn from patterns, and make data-driven decisions automatically.
Understanding viaSocket AI Agents
Traditional viaSocket automations follow a simple, linear structure—trigger-action, making it easy to set up workflows. You define the steps, and once the trigger happens, the action is carried out.
While this structure works well for many tasks, it can become cumbersome when your workflows need to handle a variety of different scenarios.
As you add more conditions, branches, and steps to manage multiple possibilities, your workflow can quickly turn into a complex decision tree. This can be hard to manage, update, and troubleshoot over time.
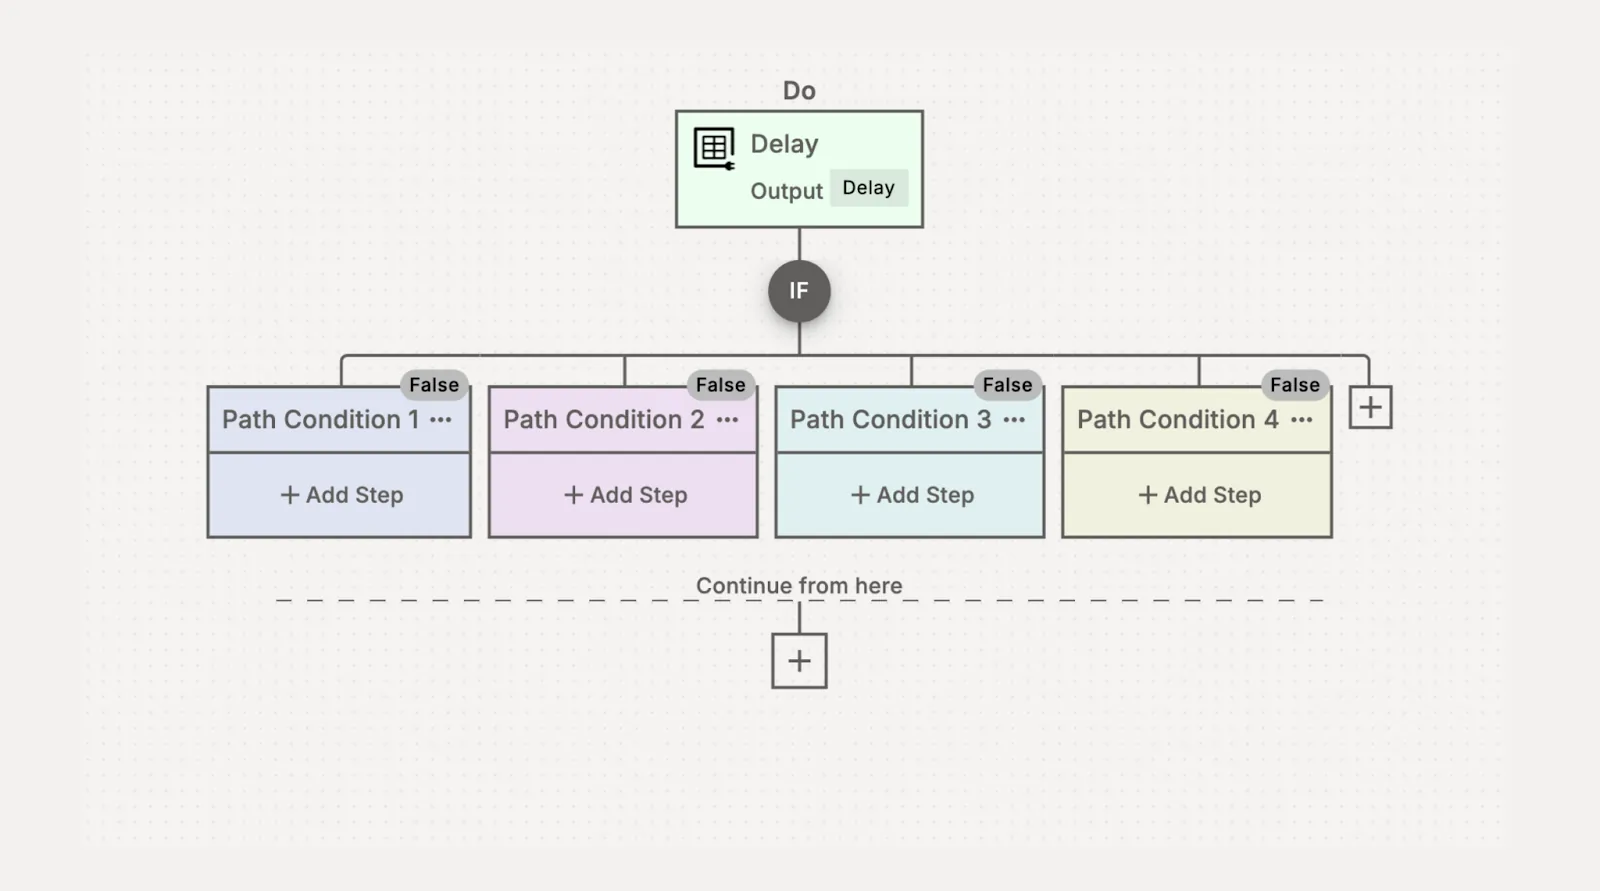
This is where AI agents come in. Instead of relying on rigid, predefined paths, AI agents in viaSocket can make smarter decisions on the fly, adapting to different situations with minimal configuration.
No more endless branching or complicated workflows; just intuitive, intelligent automation that evolves as you need it.
Creating your First AI Agent
Creating a basic customer support AI agent that can handle incoming email inquiries is a great way to automate support and improve efficiency.
Here’s a simple step-by-step guide on how to set up such an agent:
Step 1: Define Your Trigger (Incoming Email)
The first step is to decide what will trigger the AI agent. In this case, the trigger will be an incoming email from a customer.
• Choose Your Email Provider: Connect the email service you use (like Gmail, Outlook, or a custom SMTP server).
In this, I use the Gmail email service provider.
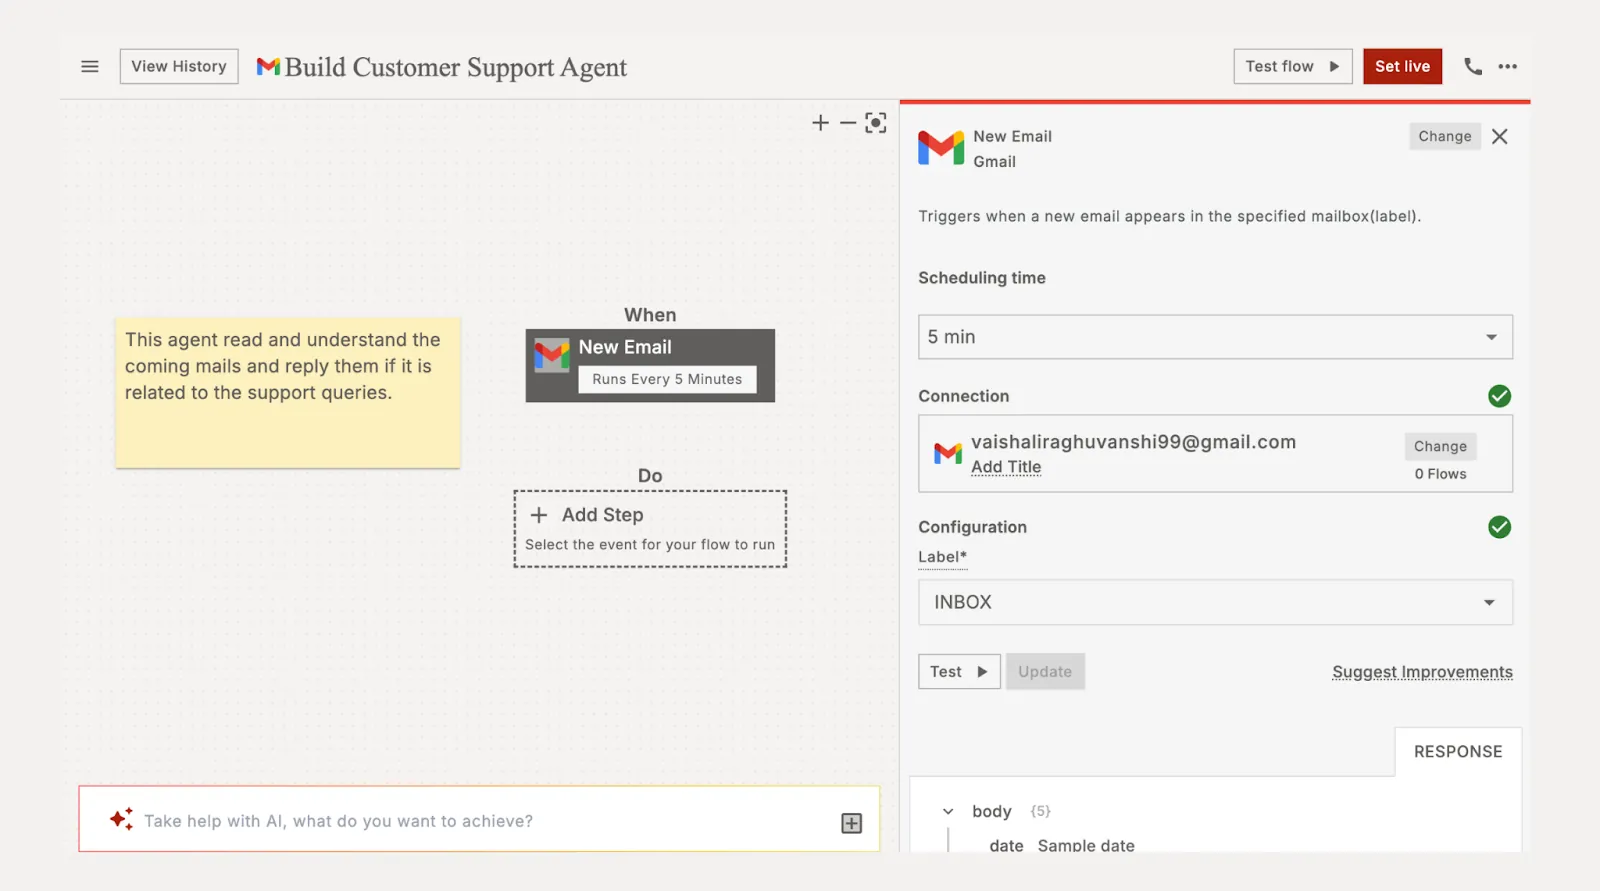
Step 2: Set Up the AI Agent
To set up the AI agent for handling incoming email inquiries, we’ll break it down into a few key components.
Step 2.1: Choose Your LLM Service
In this step, you'll need to select which Large Language Model (LLM) service you want to use for your AI agent.
The choice you make will depend on the specific requirements of your project and the capabilities you need.
Select the LLM service that fits your needs:
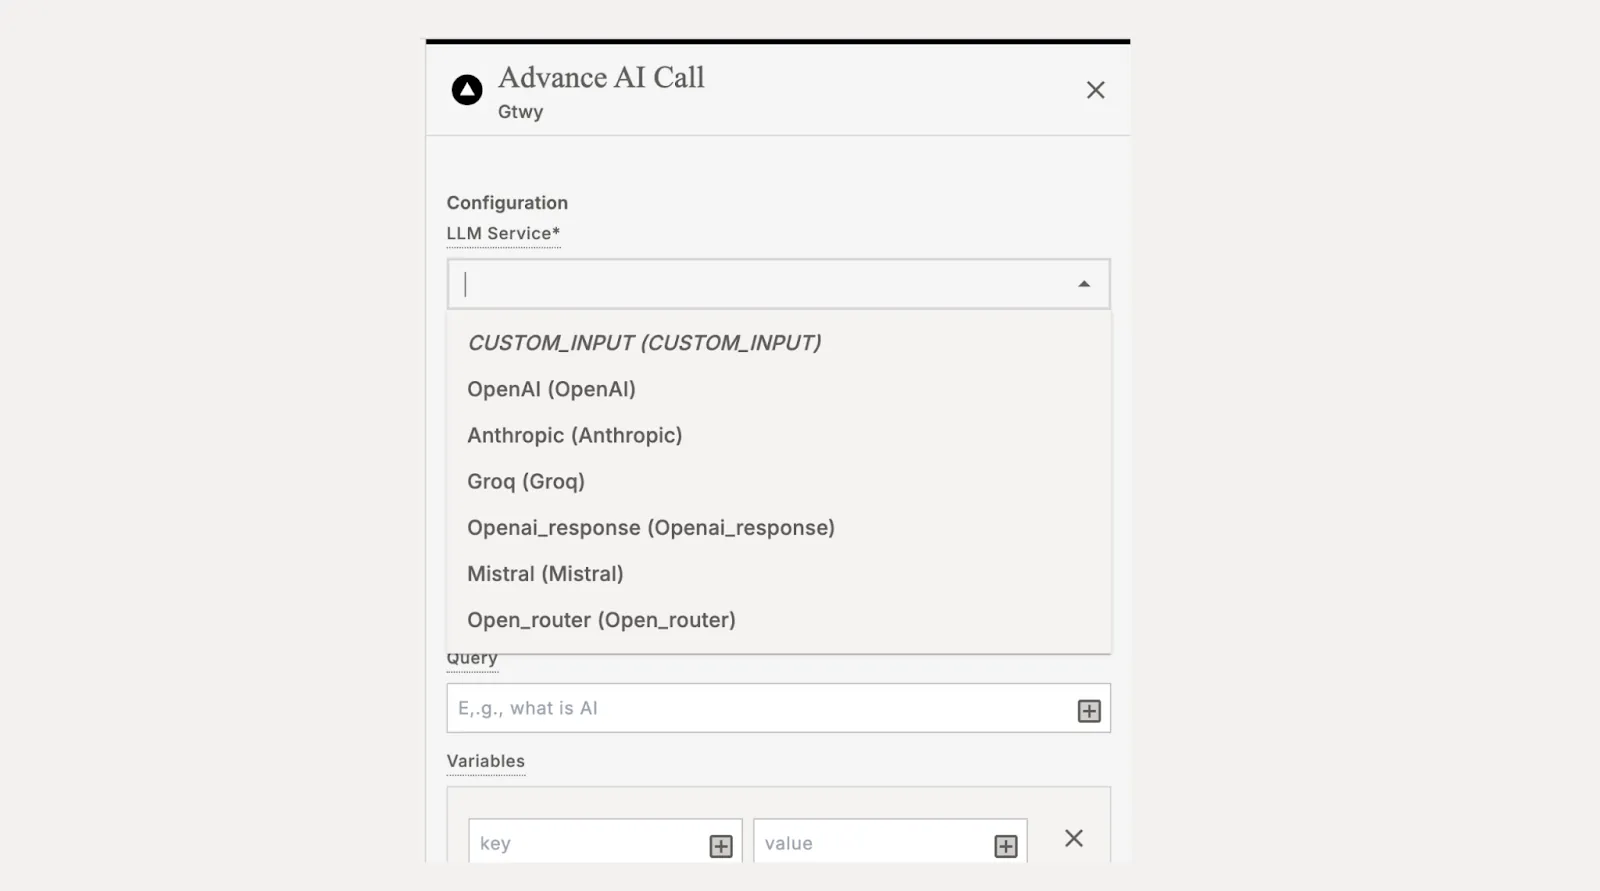
- CUSTOM_INPUT: For custom AI models or specific configurations.
- OpenAI: General-purpose AI (text generation, Q&A, etc.), ideal for most tasks.
- Anthropic: Focused on AI safety and alignment, great for ethical AI use.
- Groq: High-performance models for speed and efficiency in real-time tasks.
- Openai_response: Predefined OpenAI responses for specialized use cases.
- Mistral: Optimized for high-efficiency and fast processing.
- Open_router: Routes queries to the best AI model based on the input.
Choose based on your project needs, OpenAI is a safe, versatile choice for most scenarios.
After choosing the LLM Service, select the LLM model. And generate and past your API key.
Step 2.2: Write a Prompt
Now that you've selected your LLM service, it’s time to create a prompt that will guide the AI in performing its task.
The prompt is a clear instruction that tells the AI what to do, making it crucial for generating accurate and helpful responses.

Prompt:
"When a new email arrives, review its contents to determine if it contains a customer question. If it does, search for the answer using [insert "Find data" source here]. If the correct answer is found, respond to the customer in a clear, concise, and courteous tone with the accurate information.
Important: If the answer cannot be found in the data source, do not attempt to respond. Avoid making up information or providing a response when the correct answer is not available."
Step 2.3: Test and Save the AI Agent
Send a test email to check if the AI correctly answers the query from the data source. Refine the prompt if needed to ensure accurate responses. Once tested, save and enable the AI agent to start handling emails automatically.
Step 3: Set the Action to Reply to Email
To enable the AI agent to automatically send a reply, select the "Send Email" action in your workflow settings.
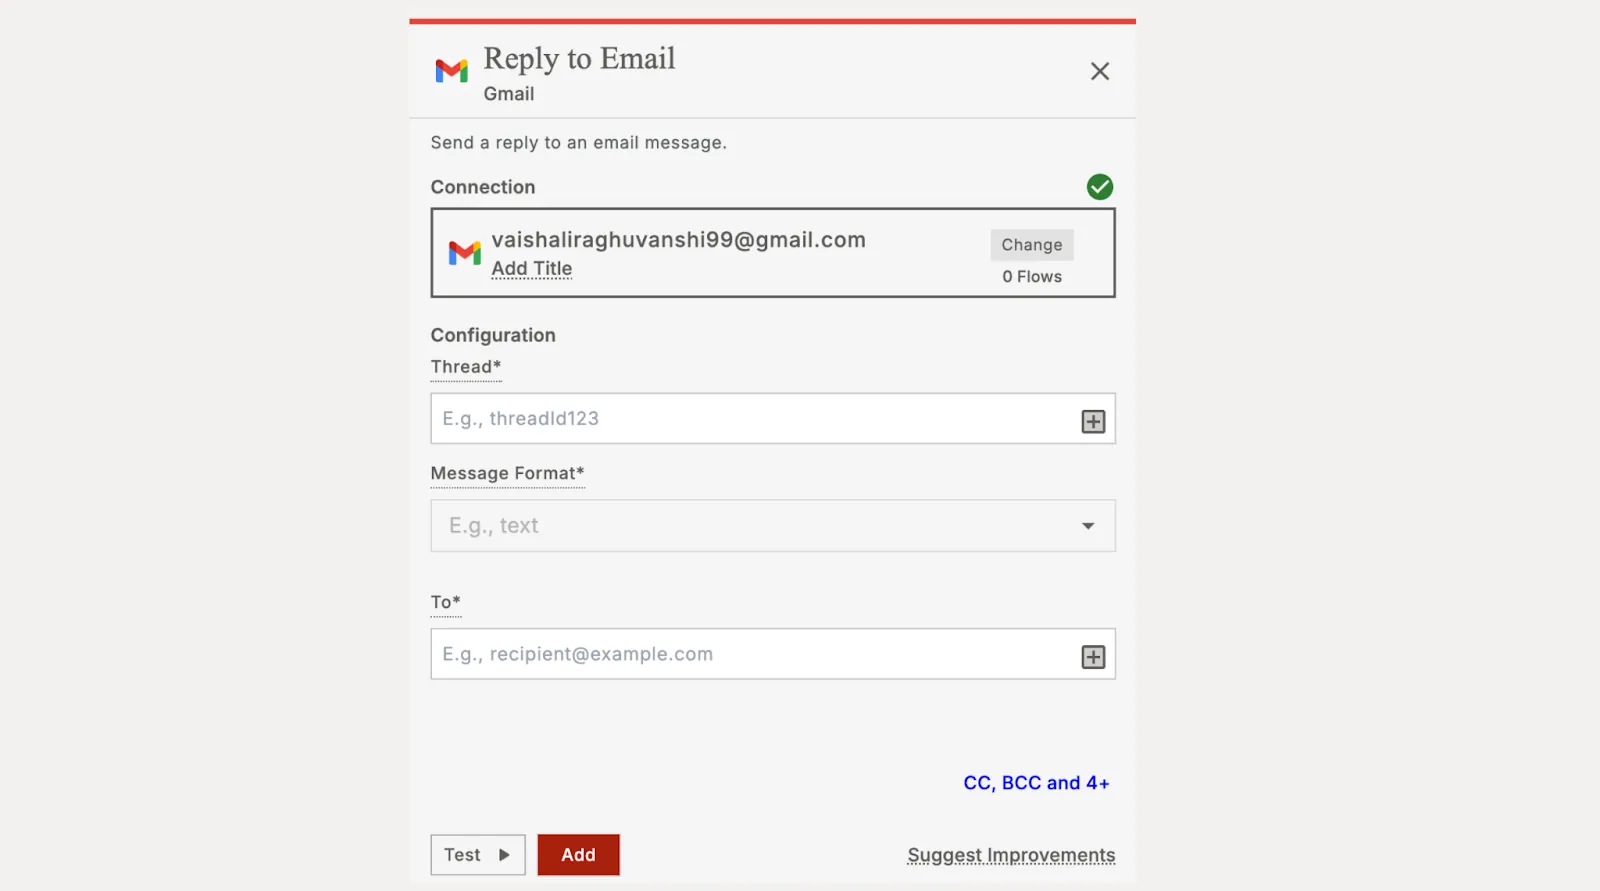
Configure the email by using the customer’s email address as the recipient, and ensure the subject line is relevant (e.g., “Re: [Customer Inquiry]”).
In the body, the AI should generate a clear, accurate, and concise response. Set conditions so the email is only sent if the agent finds a valid answer in the data source; if no answer is found, the AI should refrain from replying.
After setting this up, test the action to ensure the AI replies correctly with the appropriate response. Once confirmed, the AI will automatically handle customer replies based on these conditions.
Simplify Your Workflow with viaSocket AI Agents
viaSocket's AI agents make automation easier and more powerful. By using simple instructions and AI decision-making, these agents can handle complex tasks and adapt to changes without needing complicated setup.
Whether it’s customer support, lead processing, or managing workflows, viaSocket AI agents provide a smarter, more flexible way to automate—without any coding required. With viaSocket, automation is simple, accessible, and effective for everyone.