How to create Plugins in viaSocket?
viaSocket's Plugin builder allows you to create custom integrations between your favorite apps and the viaSocket platform. This detailed guide will walk you through each step of the process, from initial setup to deployment, ensuring you can create powerful and efficient workflows tailored to your needs.
The Plugin builder in viaSocket is designed to be user-friendly, enabling both developers and non-developers to create custom app integrations. Whether you want to bring a new app into viaSocket or enhance the functionality of an existing app, the Plugin builder provides the necessary tools and flexibility.
The following steps will guide you through creating a plugin in viaSocket.
Visibility Configuration
Authentication
Create Triggers
Create Actions
Define Input Fields
AI Assistance at every step
viaSocket’s AI is designed to make the plug creation process as simple and efficient as possible. At each step, the AI provides valuable support, such as automatically fetching the icon of an app when you provide its domain and recommending most useful triggers and actions based on your needs.
Access the Plugin Builder
Navigate to the Developer Hub section.
Click on the Plugin Builder option.
Once inside the Plugin Builder, select "+Create New Plug" to begin creating your custom plug.
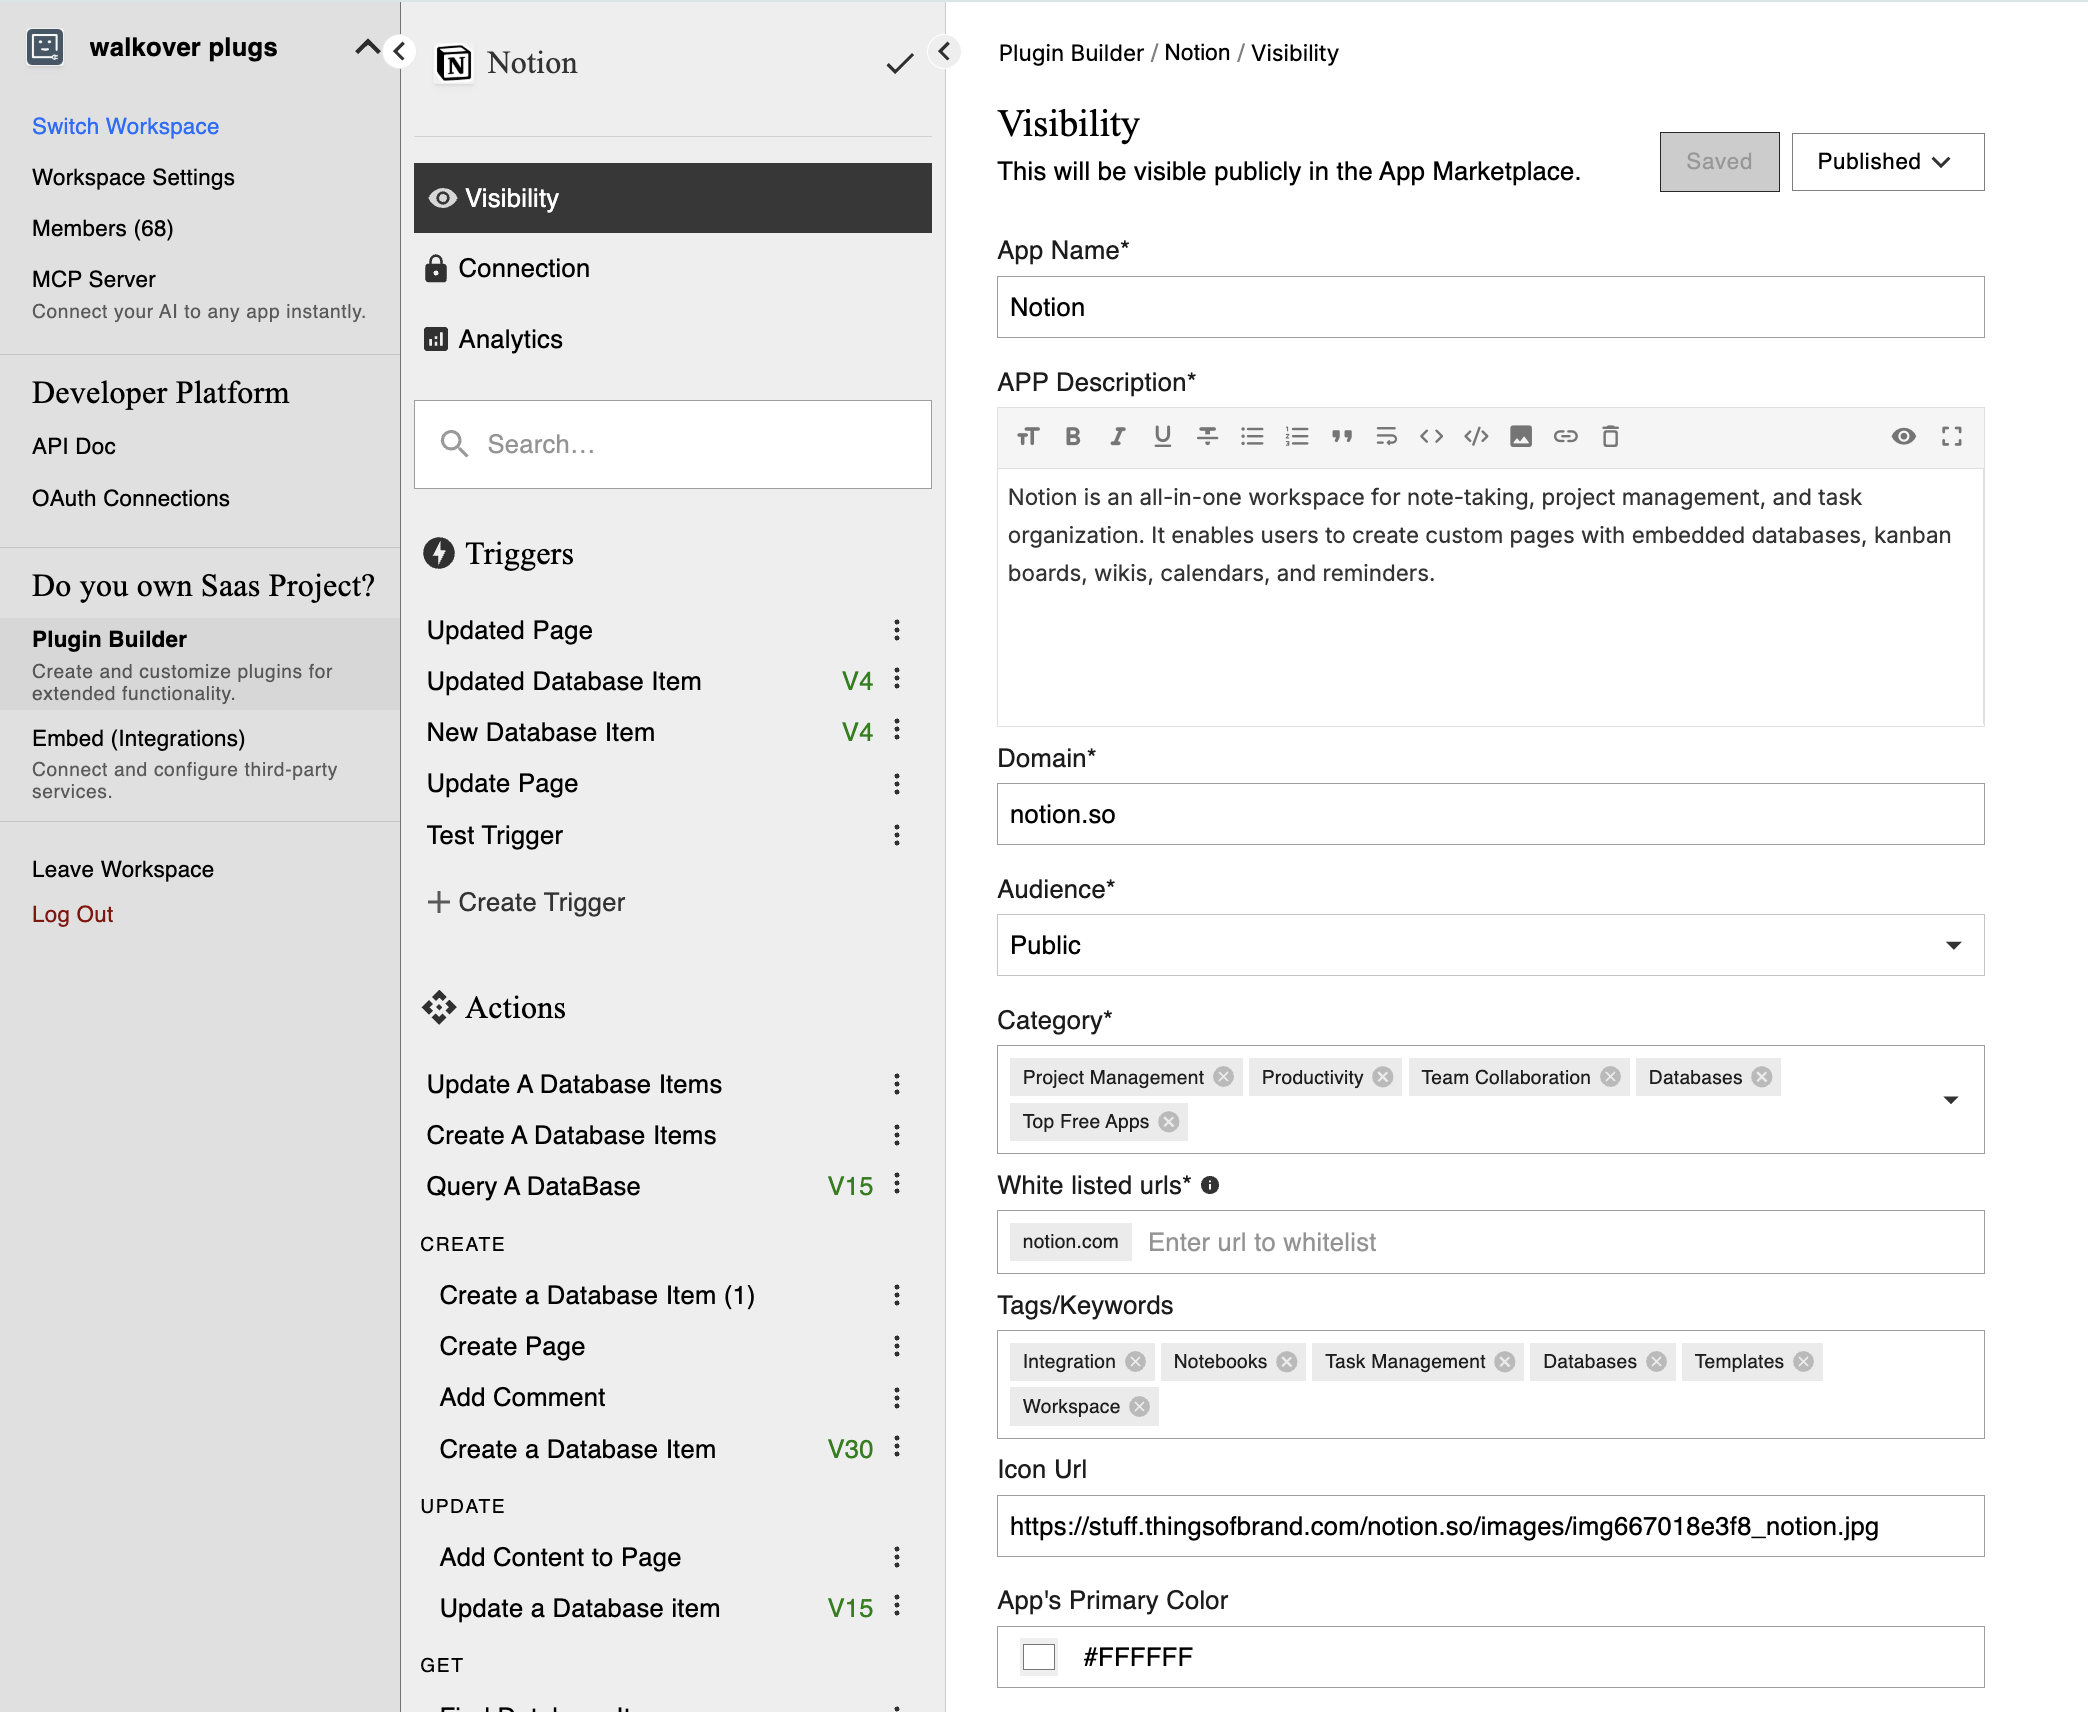
1. Visibility Configuration
This includes choosing a unique and descriptive name, uploading a relevant logo for display in viaSocket's app library, and deciding on the plugin's audience. You can set your plugin to Private, making it available only to your account or organization, or Public, which allows it to be listed in viaSocket's "Integration" library for access by all users.
2. Authentication
In the authentication step, you determine how users will authenticate their accounts before connecting the app to viaSocket for workflows. This process ensures secure communication between viaSocket and the integrated app. Authentication methods can vary depending on the app:
Basic Authentication: Requires users to enter an API key or username and password.
OAuth 2.0: Involves providing a client ID, client secret, authorization URL, and token URL for more secure and scalable access.

The choice of authentication method depends on the specific requirements of the app being integrated.
3. Create Triggers
Triggers are the events that start workflows .When creating triggers for your plugin, you can choose between two types:
Instant Triggers: These use webhooks to initiate workflows instantly when an event occurs in the integrated app.
Scheduled Triggers: These use APIs to poll data at regular intervals, such as every 15 minutes, to check for updates and trigger workflows accordingly.
For example, "New Email Received" in an email app or "New Order Created" in an e-commerce platform.

4. Create Actions
Actions are tasks executed in response to triggers within your plugin. They perform specific functions or operations in the integrated app based on the data received from the trigger.
For example, "Send a Message" in a messaging app or "Update a Record" in a CRM system.

5. Define Input Fields
Input fields are the parameters that users need to provide to execute triggers or actions.
Clearly define the input fields, including their names, data types (text, number, date, etc.), and validation rules.
Ensure that all required fields are clearly marked, and optional fields are identified accordingly.

Testing and Deployment
Test Your Plugin: Before deploying, thoroughly test your plugin to ensure all triggers, actions, and authentication methods work correctly. Use the "Test" feature in viaSocket to simulate various scenarios.
Publish Your Plugin: Once your plugin is tested and customized, click "Publish" to make it live. Choose whether to keep it private or make it public on the viaSocket.
Monitor and Maintain: After deployment, monitor your plugin's performance through the viaSocket dashboard. Update and maintain your plugin regularly to fix bugs, add new features, or improve performance based on user feedback.
Creating a plugin in viaSocket is a powerful way to extend the capabilities of your apps and automate workflows. By following this step-by-step guide, you can create robust and efficient integrations tailored to your specific needs, enhancing productivity and streamlining processes.