
Twitter (X) Connection
In this discussion, we'll go through how to set it up Twitter (X) with viaSocket.
1. Create a Twitter(X) Developer account:
• If you don't already have a Twitter Developer account, you need to set one up.
• It only takes a few minutes.
• Go to this page and sign up for a free account: https://developer.x.com

Once you signup, you will be asked to briefly describe your use case of Twitter's API.
You can use the below mentioned use cases for reference:

As a viaSocket user, I can automate my Twitter marketing using the Twitter Data API. With viaSocket, I can easily post tweets with media, search for users, and send direct messages without leaving the platform.
viaSocket’s "Create a Tweet with Media" action allows me to upload media files and attach them to tweets directly within the viaSocket interface.
The "Search Twitter Users" action in viaSocket helps me find users based on location, interests, or hashtags. Additionally, I can use the "Send Direct Message" action to contact users directly.
By integrating with the Twitter Data API, viaSocket simplifies social media marketing. I can schedule tweets, track engagement, and communicate with users to grow my presence on Twitter—all from within the viaSocket platform.
• Click Submit.
• Now you can access your twitter developer's portal.
How to setup your app in Twitter:
If you click the "Twitter API v2" project, you should see that you are on a Free account.
You will be able to publish up to 1500 tweets per month.
This covers scheduling and social inbox for most users.
To enable analytics, posting condition, the best time to post, and other advanced features, you will need to upgrade to their Basic plan, which cost $100/month.
Read more about what's included in the different plans here: https://developer.x.com/en/docs/x-api/getting-started/about-x-api
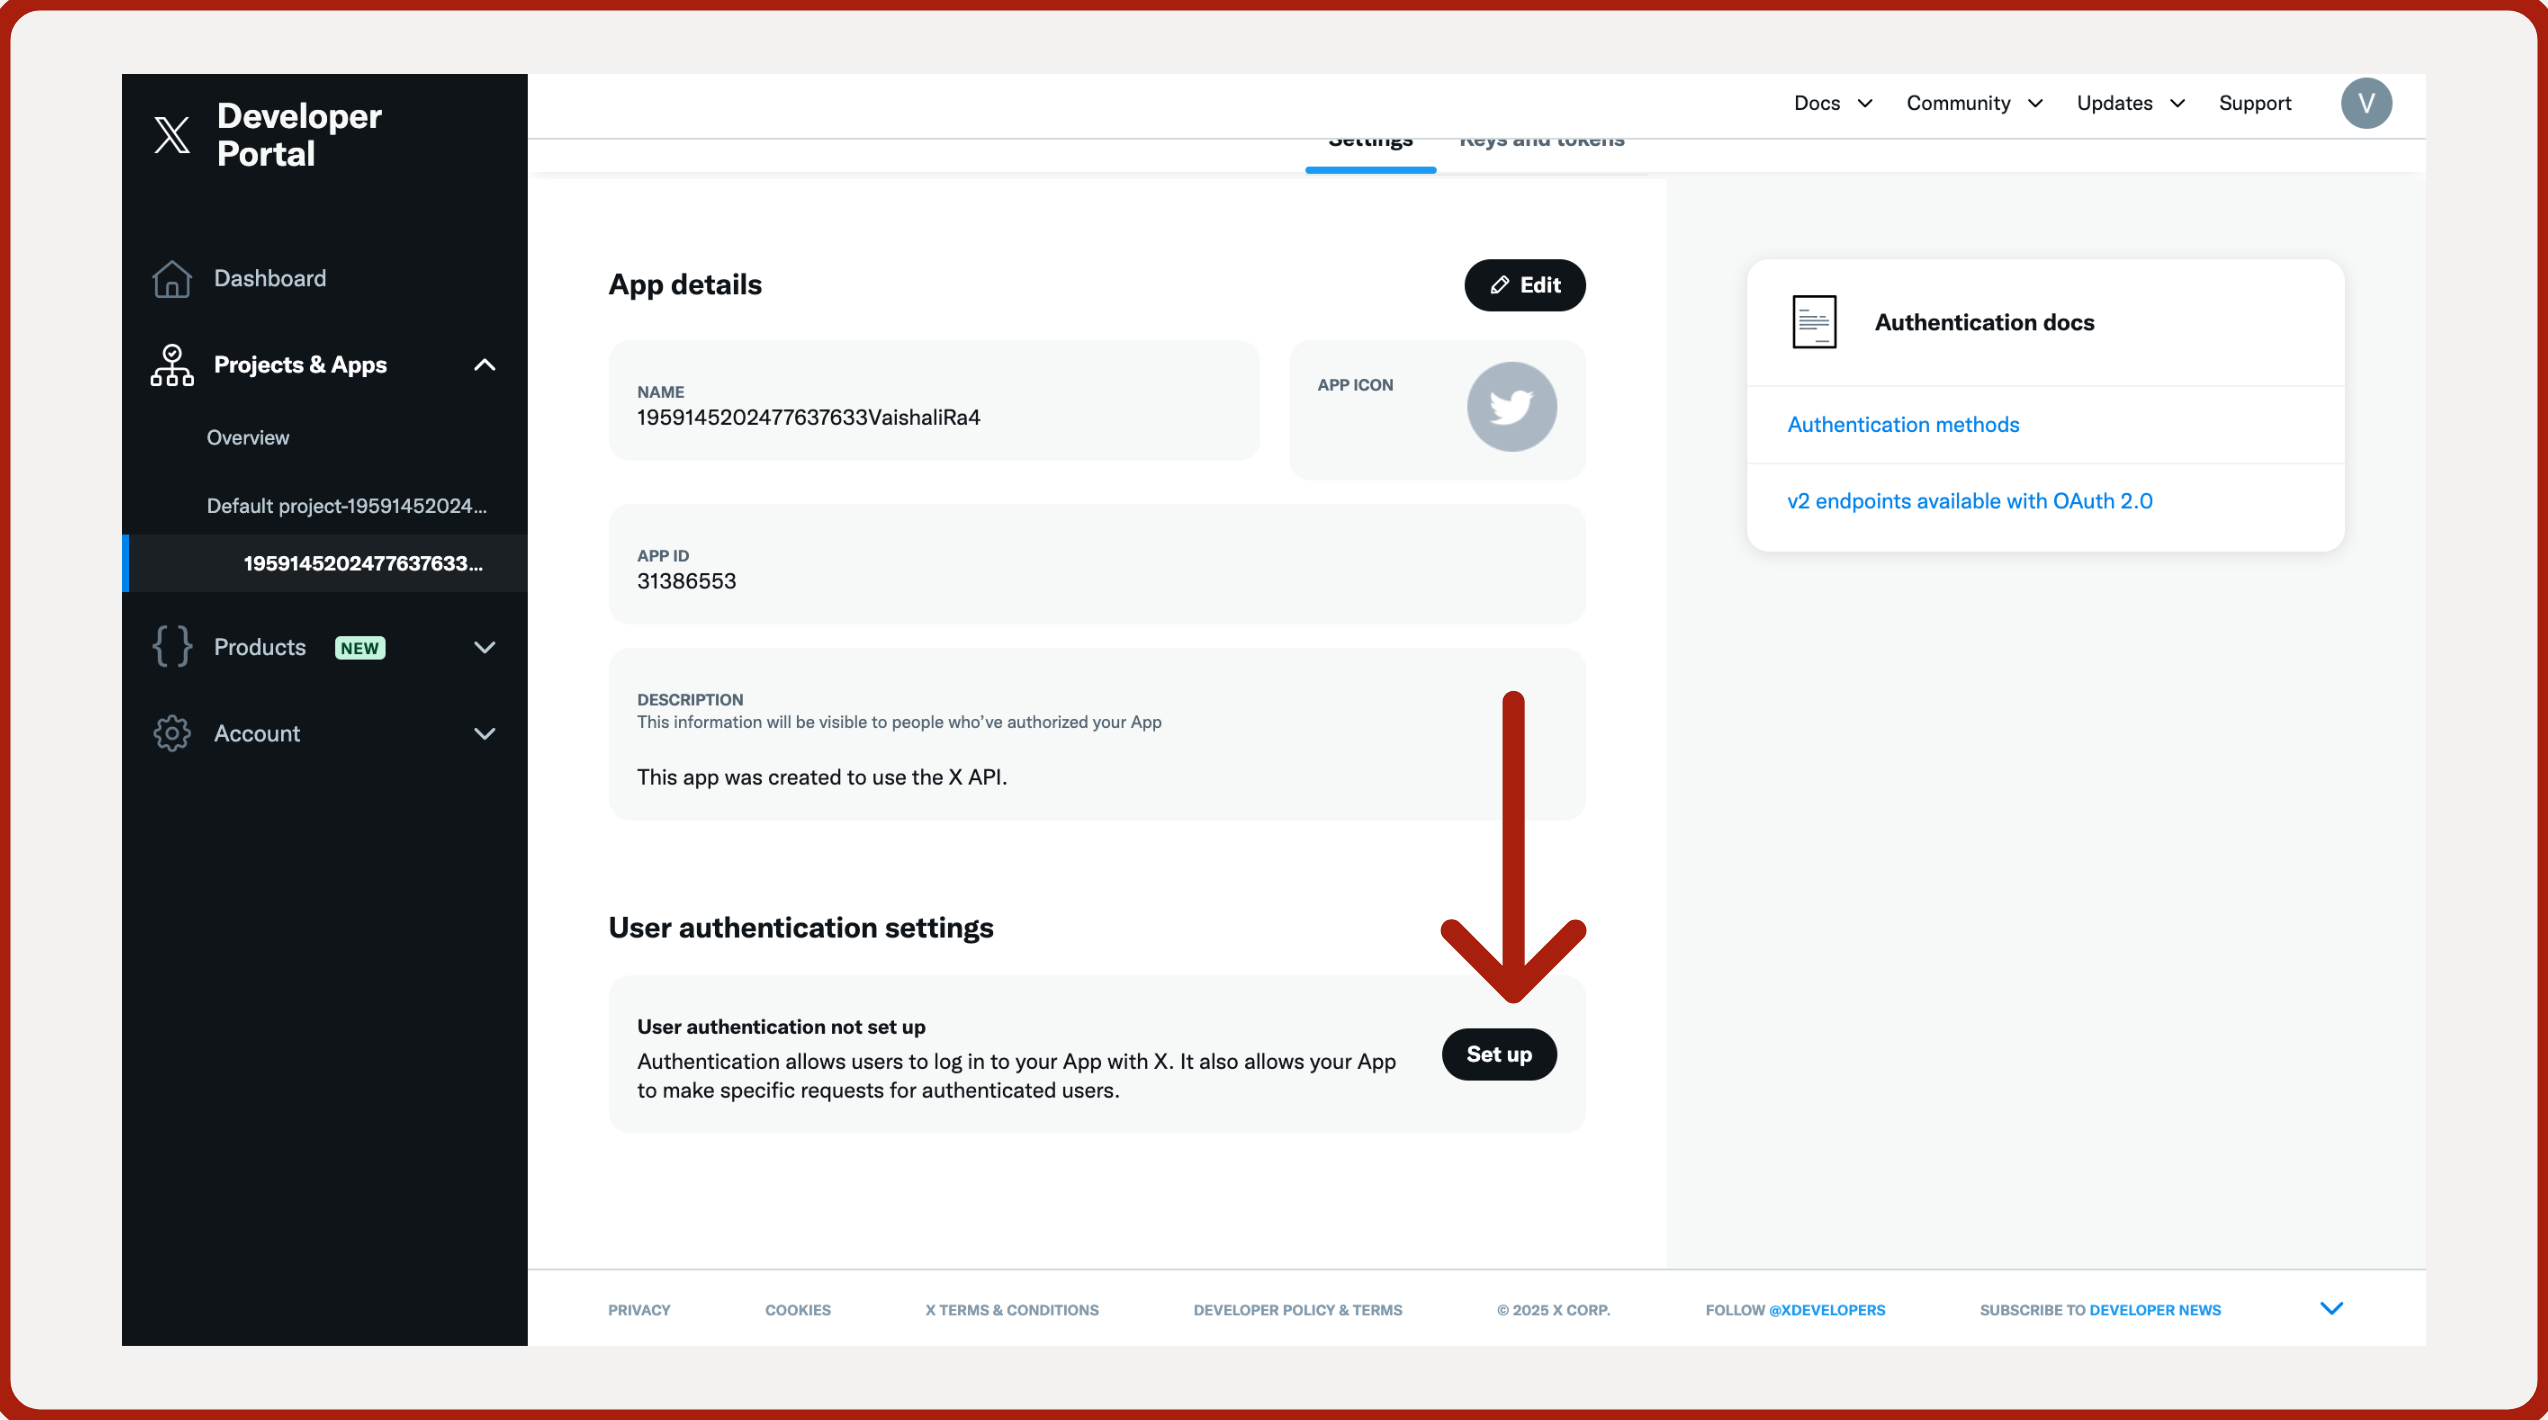
Go to the Projects & Apps menu.
Click on you App Name.
Go to setting icon.

You will see that a default project and a default app have been created for you. This is all we need.
Under User authentication settings, click the Set up button.
Set up user authentication as follows:
• Request for the Read and write and Direct message app permissions and under type of App choose Web App, Automated App, or Bot.

• Under App info add this URL in Callback URL / Redirect URL enter this URL: https://auth.viasocket.com/redirect/auth2.0
• Enter your website URL in the Website URL field: https://www.Your-URL.com/
• Other details are optional; you can provide your personal information there.
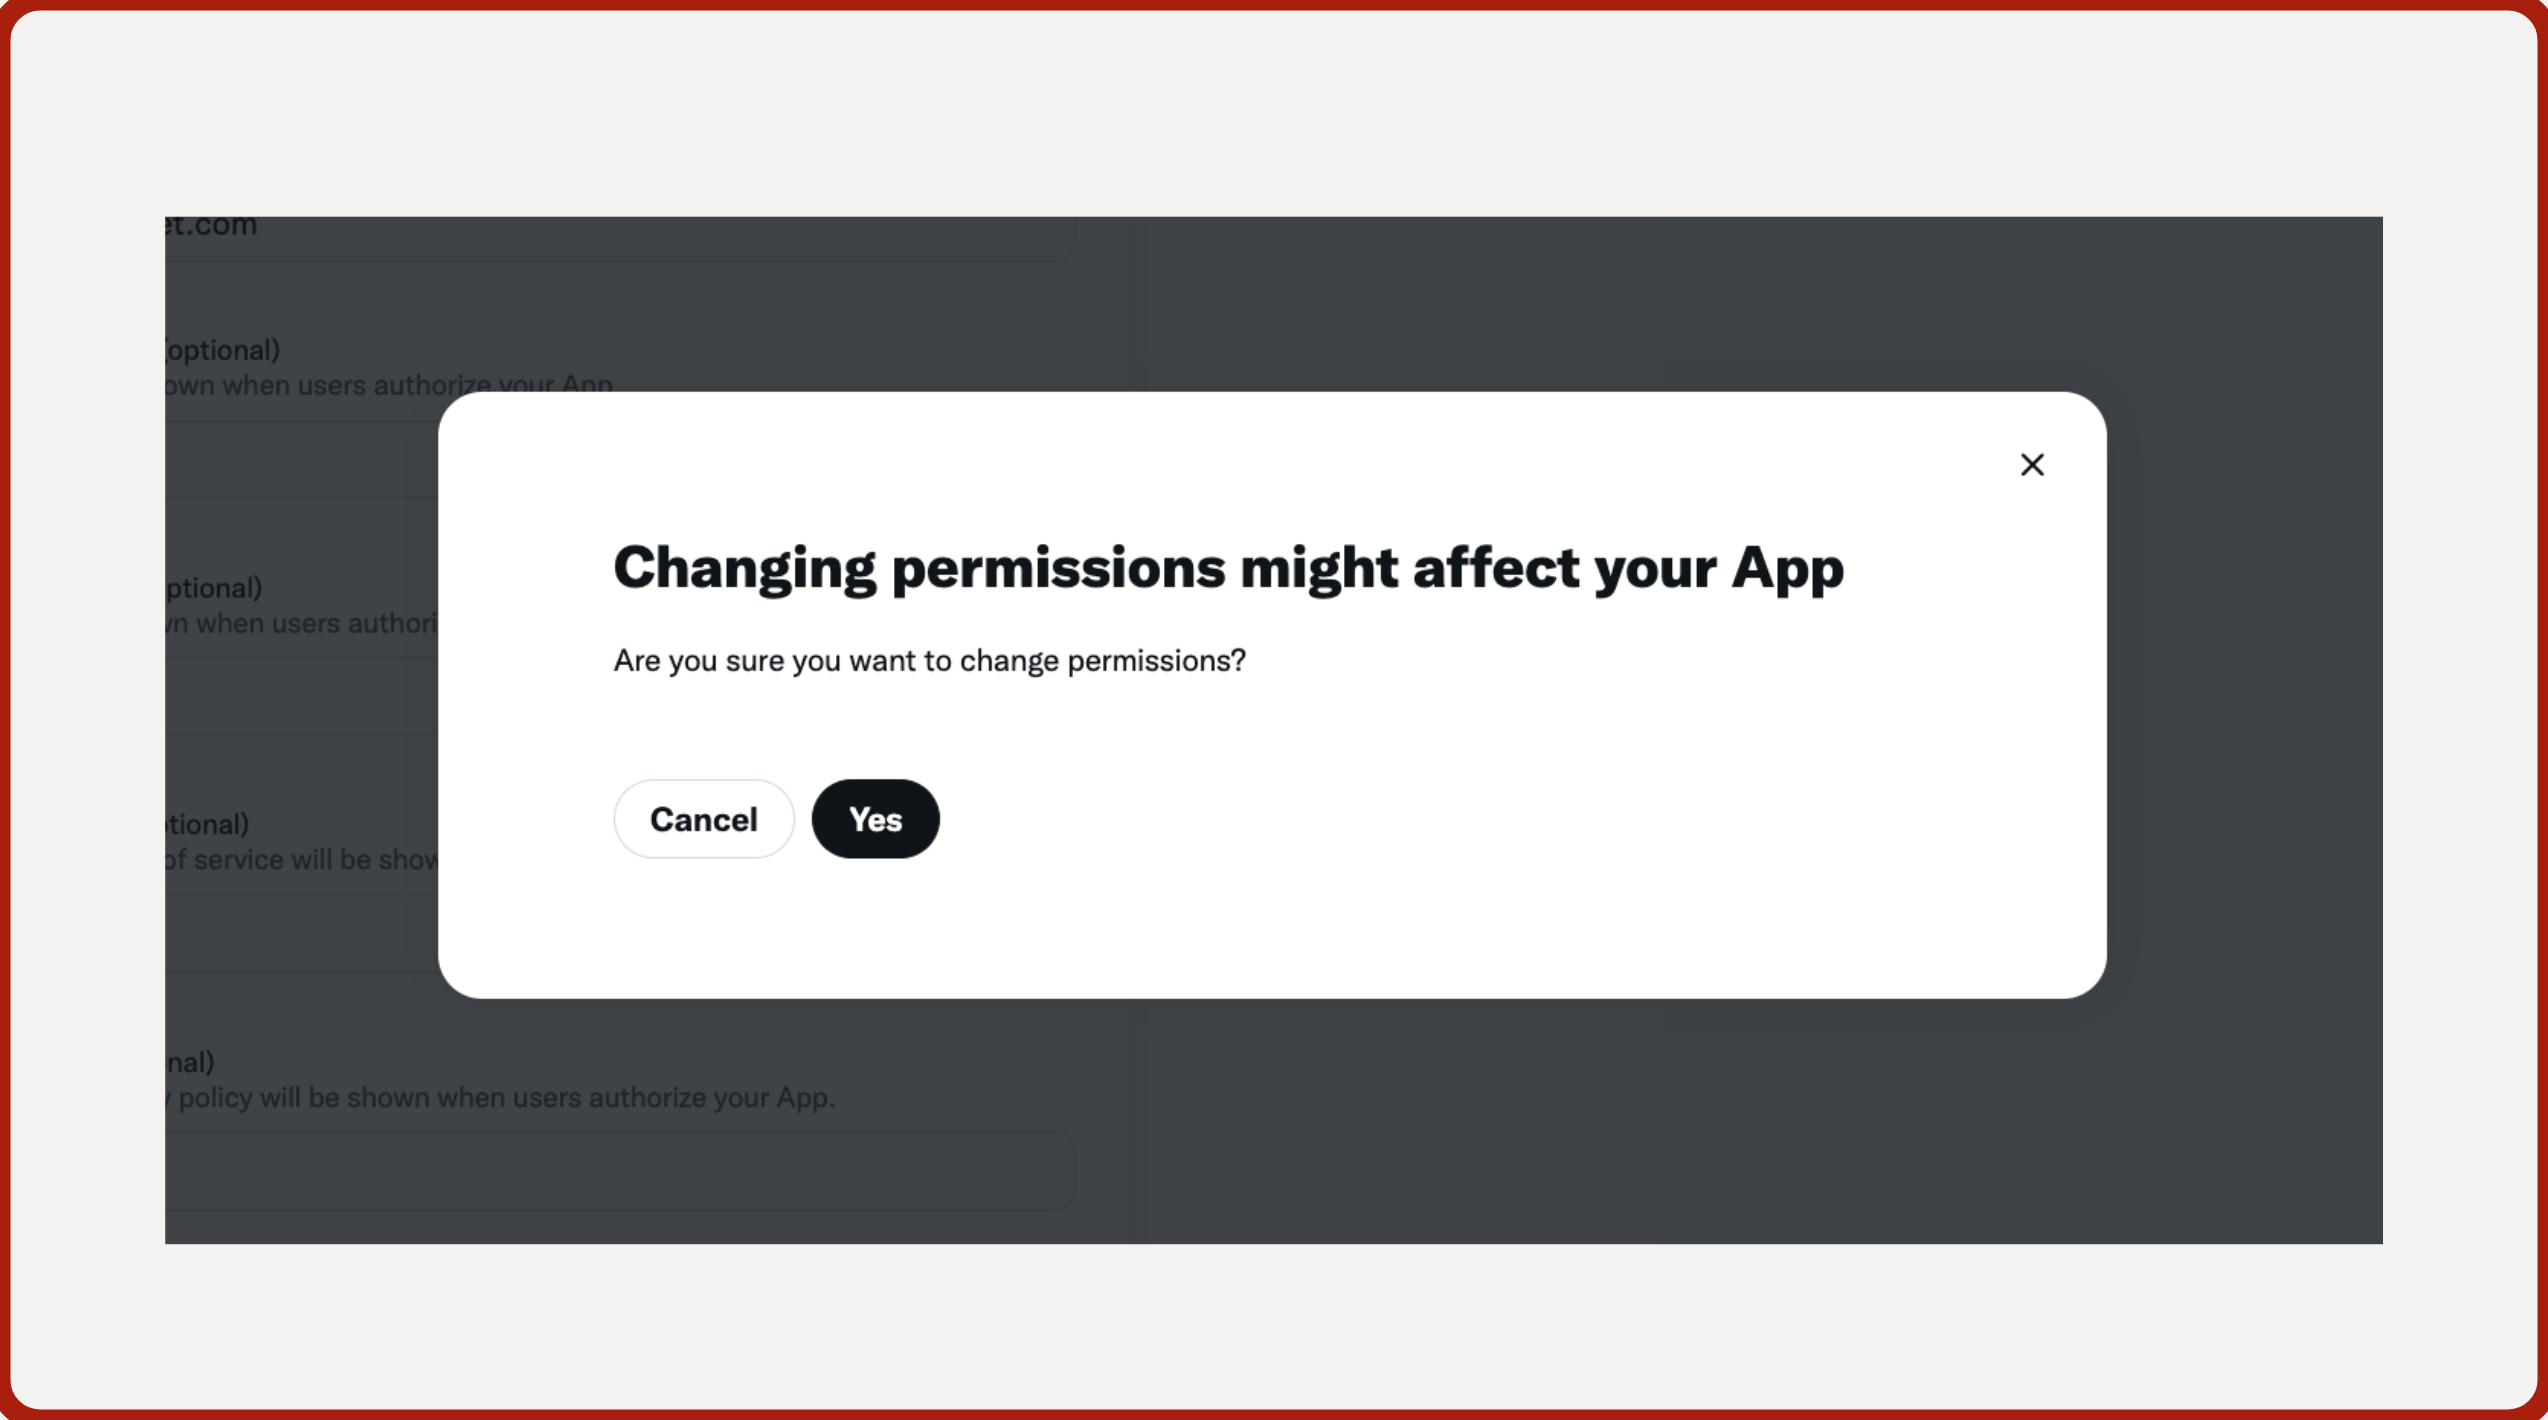
• Then click Save.

• After save click Yes on the confirmation screen.
How to get you Oauth 2.0 Client Id and Client secret?
Once you confirm the changes in the App permission in the last screen, you will be redirected to the Client Id and The Client Secret.
Once you get your Client Id and Client Secret keys, please save it for your future reference.
Setting up Twitter with viaSocket:
You will now have a Client ID and a Client Secret.
Steps to follow:
- Connect to viaSocket
- Create a Workflow. And name the workflow as per your requirement.
- At Action choose Twitter(x). Then click Connect.
- Here you need to provide your Client ID and Client Secret.

- And Click on Save.