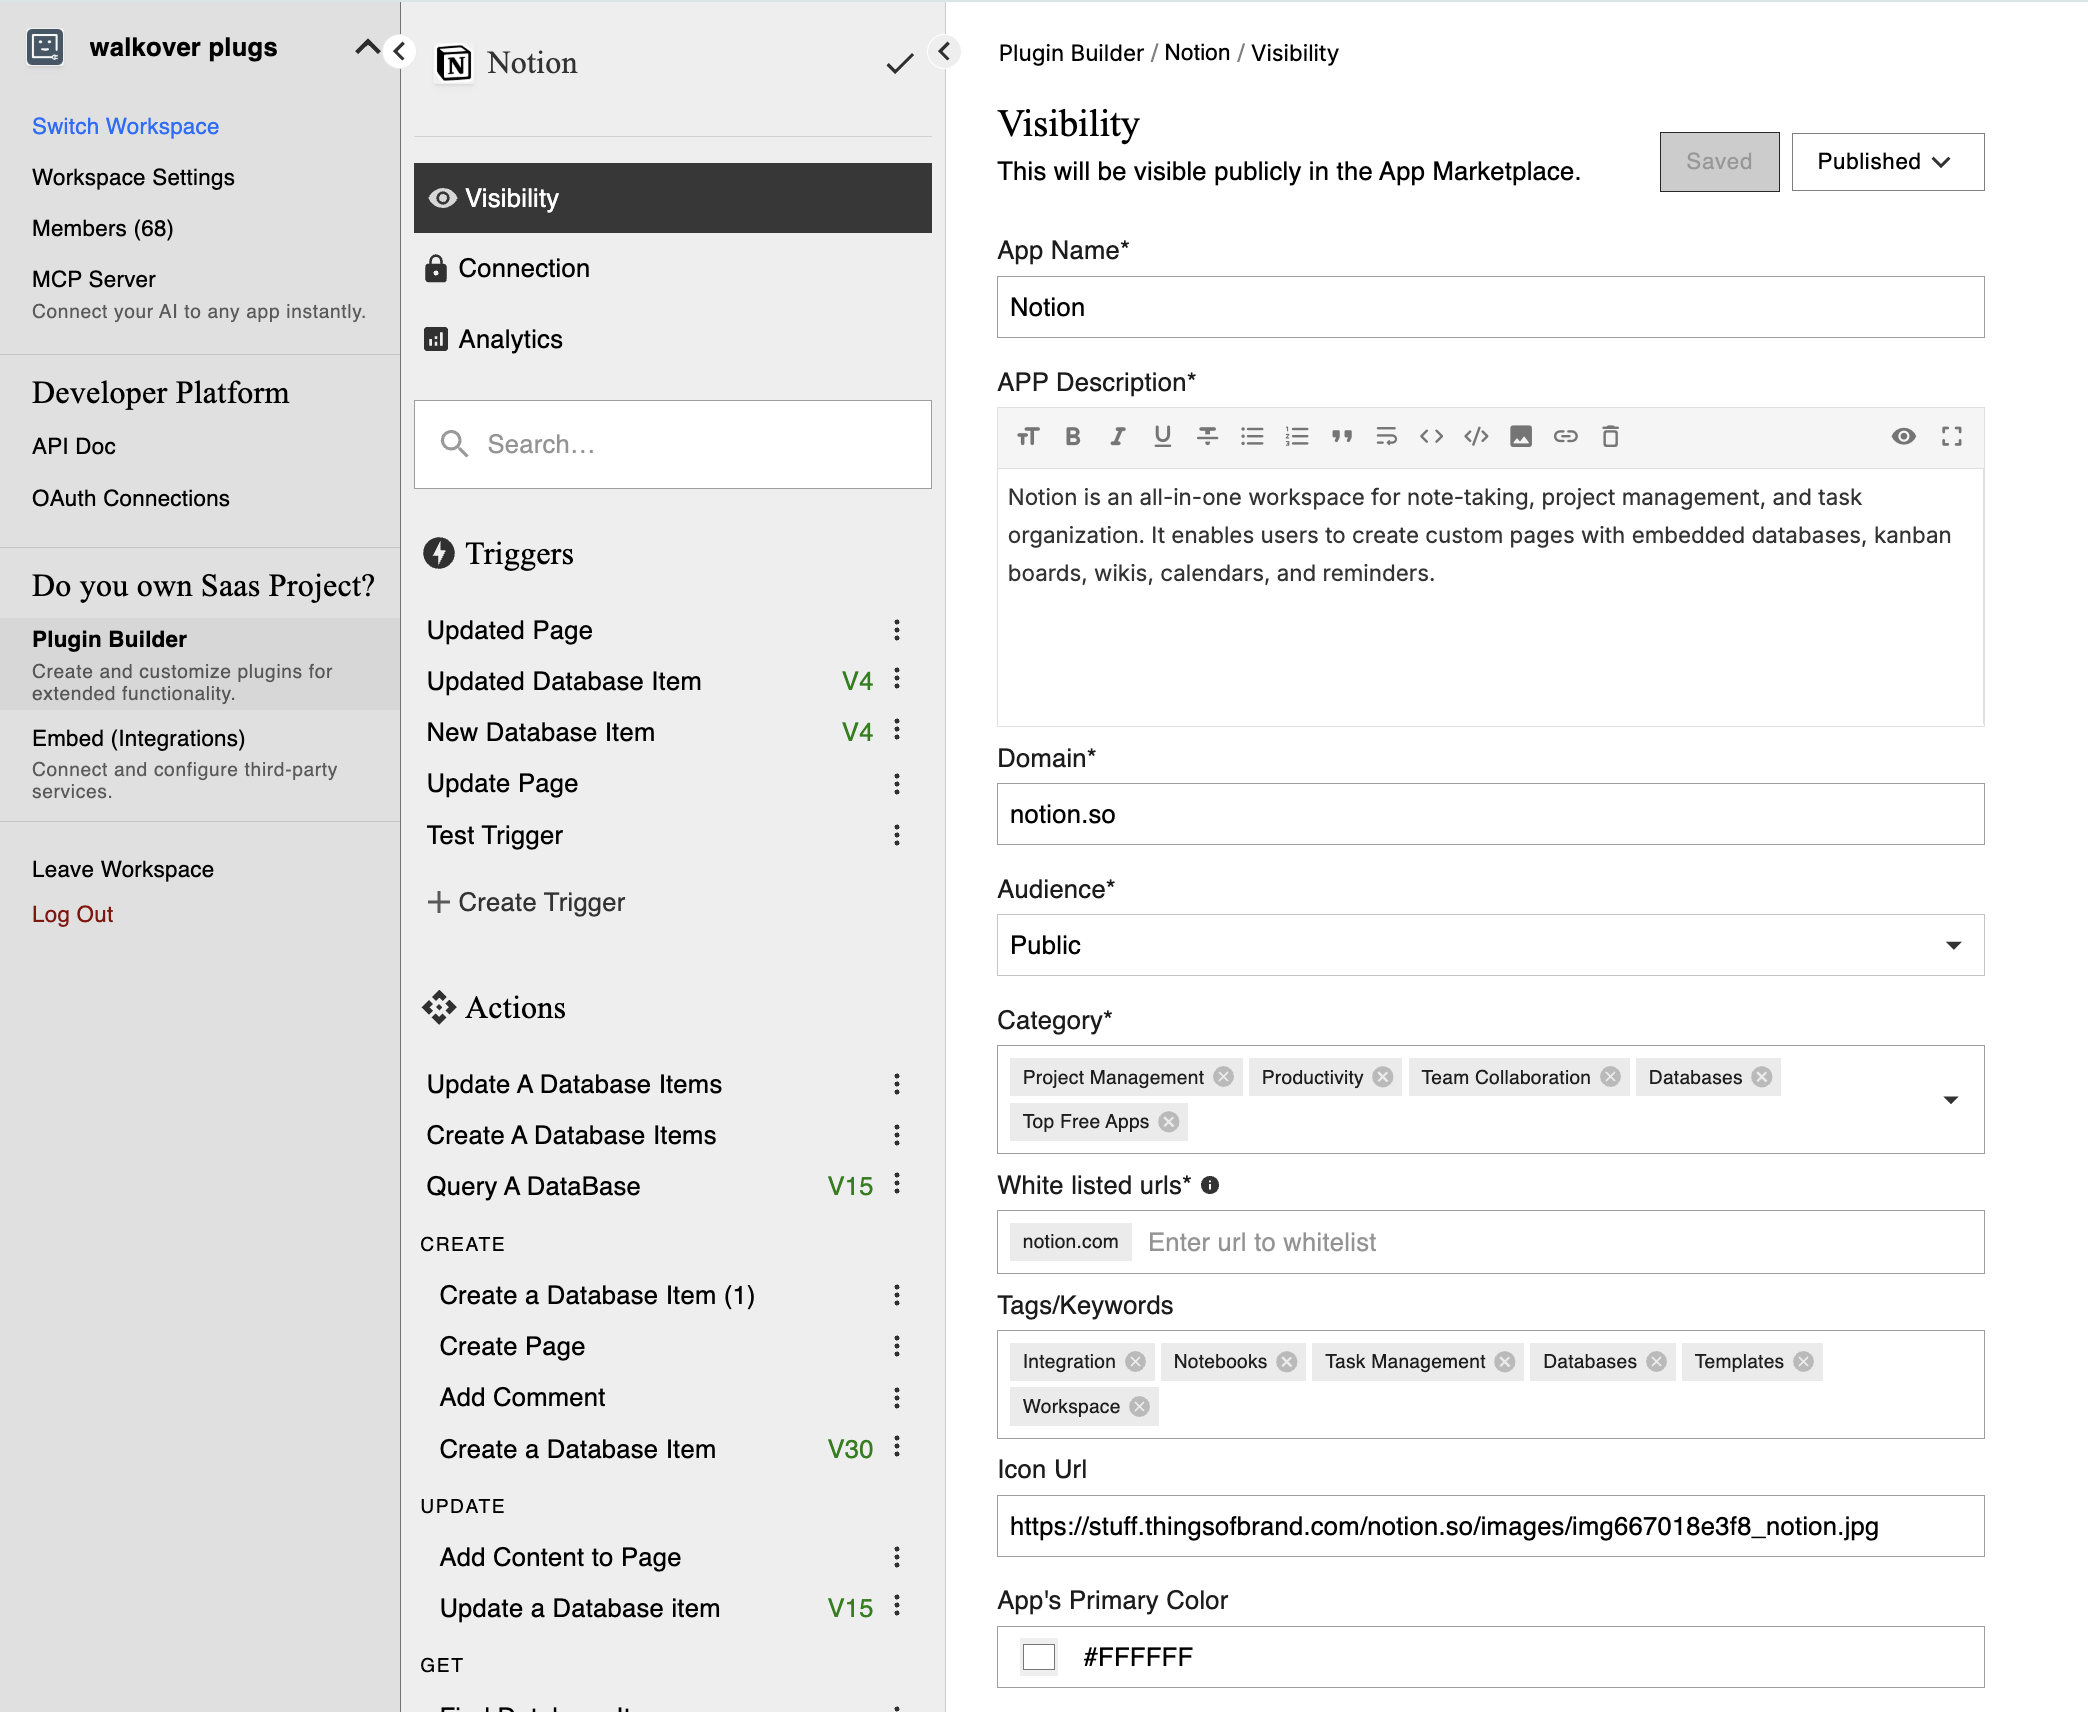
Visibility Configuration
The Visibility Configuration step in viaSocket is essential for defining how users will display and access your plugin (a "plug" in viaSocket). This initial setup ensures your app is correctly identified and categorized within the viaSocket ecosystem. Properly configuring visibility is crucial for maximizing the usability and discoverability of your custom integration. This guide will walk you through the process of configuring the visibility settings for your plug-in viaSocket.