.webp)
How to Run Automations on Historical Data
So you finally set up an automation. Feels great, right?
You connected your Google Sheet, built a workflow, and told it, "Every time someone new shows up in this sheet, send them a welcome email."
You hit go. And it works. For the new people.
But what about the 1,000 names already sitting in your sheet? The ones from last month? Or last year?
Nothing. Silence. Your automation just... skips them.
And now you're staring at a spreadsheet thinking, "Do I really have to do this one by one?"
You don't. That's exactly what we're going to fix today.
Automations Ignore Existing Data by Default
Think of automation like a security guard at the front door of a building.
The guard's job is to check every new person who walks in. But they don't go back to check everyone already inside the building.
That's how most automations work by default — they only watch for what's coming in next. They don't look back at what's already there.
So when you turn on a new automation, it starts watching from right now. Not from row 1 of your spreadsheet. Not from six months ago. Just from this moment forward.
This is totally fine if you're starting fresh. But most of us aren't starting fresh. Most of us have months of data sitting somewhere and need to do something with it.
Run Automation on Existing Data with Bulk Transfer
Here's the good news — you don't need to build a separate system for this. You don't need to hire anyone or write any code.
There's a feature called bulk transfer. And it does exactly one thing: it goes back to your existing data and runs your automation on all of it — not just the new stuff.
Think of it like telling the security guard, "Hey, I need you to also go check everyone who's already inside."
One instruction. Done.
Step-by-Step: Send Emails to Existing Google Sheet Data
Let's say you have a Google Sheet with 800 customer names. You want to send each of them a welcome email. Here's exactly how you'd set this up in viaSocket.
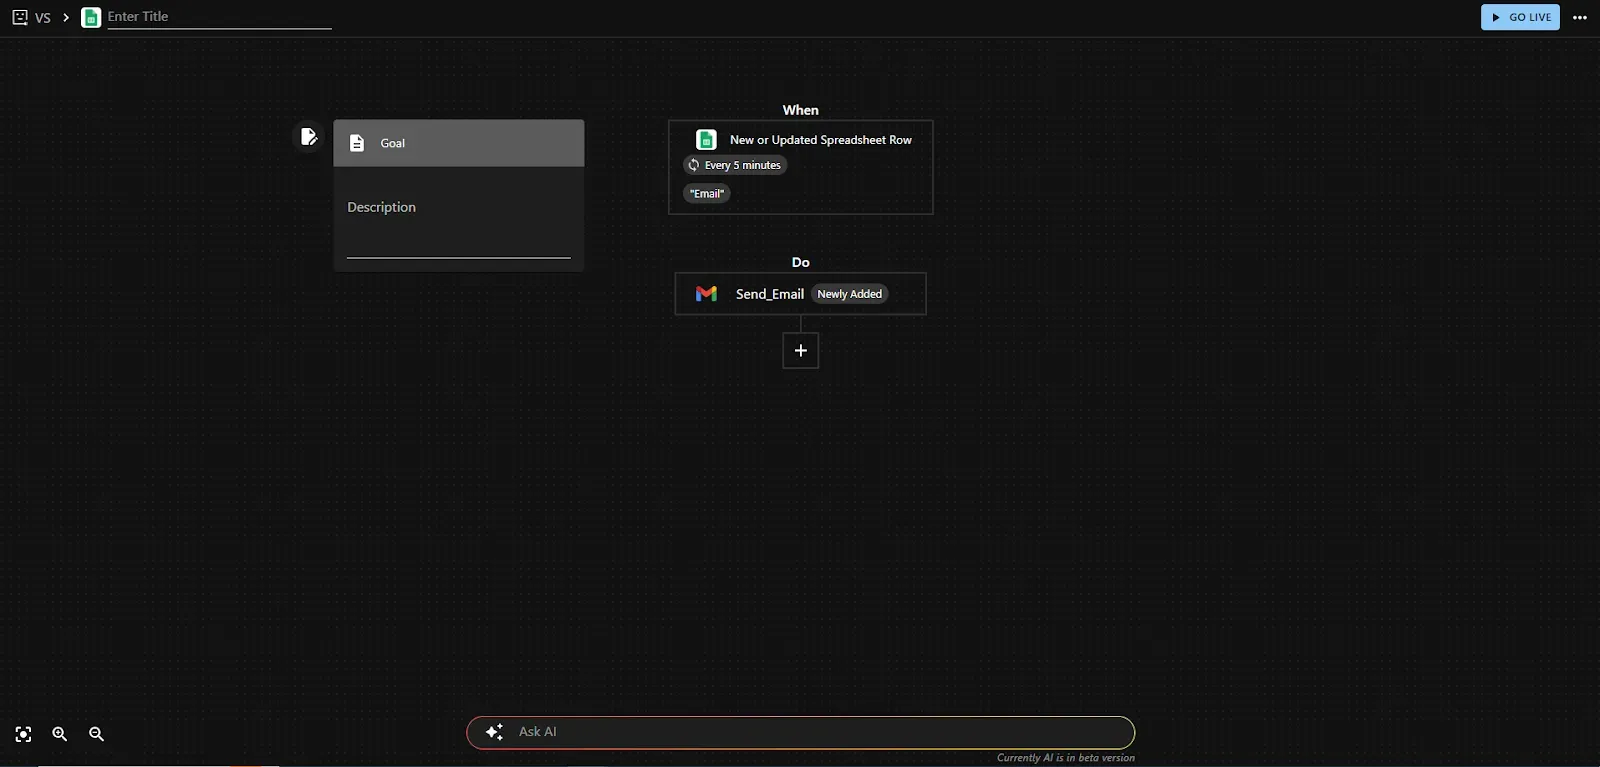
Step 1: Choose Your Trigger
Open viaSocket and create a new flow. Your first step is picking a trigger.
In this case, you'd pick "New or Updated Spreadsheet Row in Google Sheets."
This is the starting point. viaSocket will connect to your sheet and watch for any new rows.
Don't worry — you're not sending emails yet. You're just telling viaSocket where to look.

Step 2: Build the Rest of Your Flow
Now add what you want to happen after the trigger fires.
In our example, the next step would be "Send Email" — you'd type in the subject line, the message, and map the recipient's email from your sheet column.
That's your full automation:
Trigger: New row in Google Sheets
Action: Send a welcome email
Simple. Two steps.
Step 3: Go Live and Handle Existing Data
Now you're ready to turn your automation on. You click "Go Live".
But before it turns on, viaSocket pauses and asks you something.
It basically says: "Hey, I can see you already have data in this sheet. Do you want me to run this automation on the existing rows too?"
And you have two choices:
Option | What It Does |
|---|---|
No, just watch for new rows | Automation starts now, ignores the 800 existing rows |
Yes, transfer existing data too | Automation runs on all 800 rows first, then keeps watching for new ones |
You pick Yes. And that's the bulk transfer.
viaSocket goes to row 1 of your sheet. Sends an email. Goes to row 2. Sends an email. All the way down to row 800. Automatically.
You go make yourself a coffee. It's done by the time you're back.

After clicking Start Transfer

Step 4: Watch It Run
Once you say yes to the bulk transfer, you'll see your automation running in real time — viaSocket will show you how many records it has processed and how many are left.
You don't have to babysit it. You don't have to click anything. Just let it run.

Bulk Add Customers to Mailchimp
Let's make this even more concrete.
Imagine you run a small online store. You have 600 customers in a Google Sheet. A friend tells you, "You should be adding all your customers to your email list in Mailchimp."
Great idea. But manually copying 600 names and emails into Mailchimp? That's a whole afternoon gone.
Here's what you do instead:
Open viaSocket. Set the trigger to New or Updated Spreadsheet Row in Google Sheets
Add the action: Add Customer in Mailchimp
Click Go Live
When viaSocket asks about transferring data, say Yes
Walk away
All 600 customers get added to Mailchimp. Any new customer you add to the sheet in the future gets added automatically, too.
You set it up once. It handles the past and the future.
Important: Clean Your Data Before Running Bulk Transfer
Bulk transfer is powerful, but just double-check one thing before you run it — make sure your data is clean.
If your sheet has duplicate rows, empty rows, or test entries you added while setting things up, the automation will run on those too. So just do a quick scroll through your sheet, delete anything that shouldn't be there, and then go live.
Thirty seconds of checking now saves you a headache later.
Final Takeaway
If you've been avoiding automation because you thought it only works going forward, that's not true anymore.
With viaSocket's bulk transfer, it doesn't matter if your data is from yesterday or from two years ago. You set up your workflow the exact same way you normally would. The only difference is that you say "yes" when it asks about your existing data.
That's it.
No coding. No separate tools. No copying and pasting rows one by one.
Your old data finally gets the same treatment as your new data — and you didn't have to do any of it yourself.
If you have a spreadsheet full of data you've been meaning to "deal with," this is your sign. Set up your trigger, build your flow, and let viaSocket handle the rest.

