Authentication
Next step to set authentication for your plugin. In Authentication Configuration viasocket provide three types of authentication methods for your application :
No Auth
Basic Auth
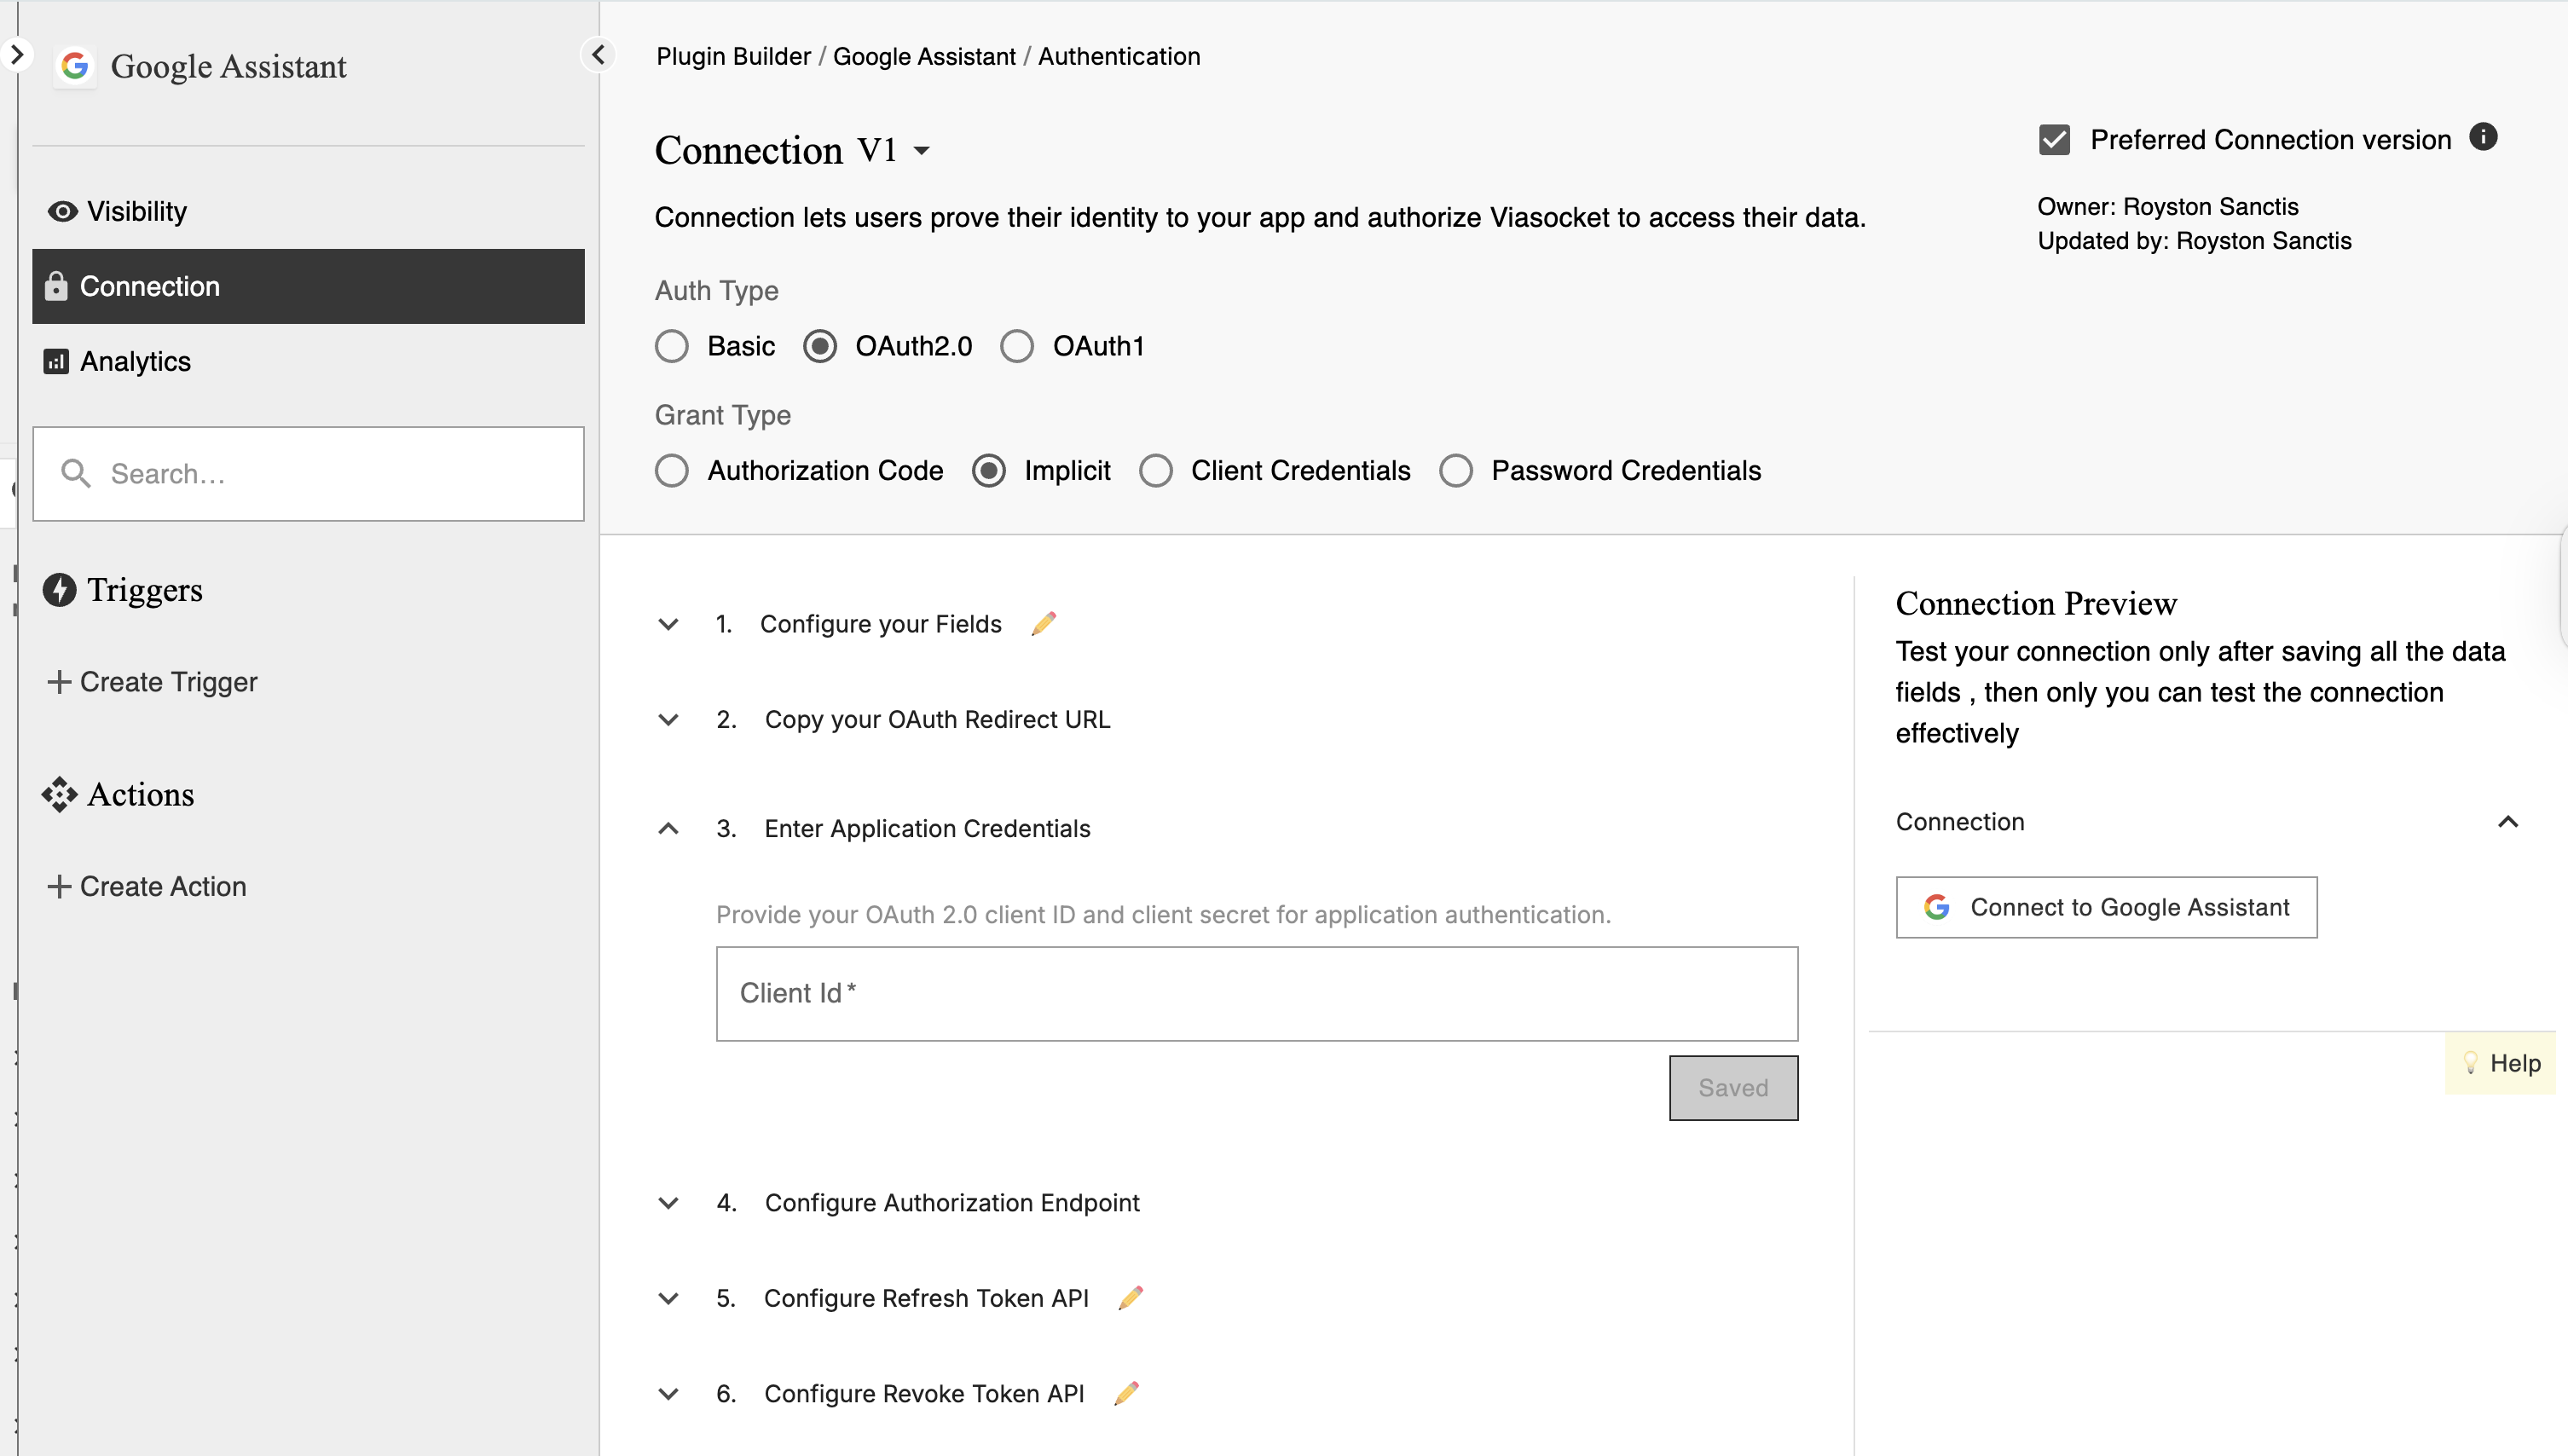
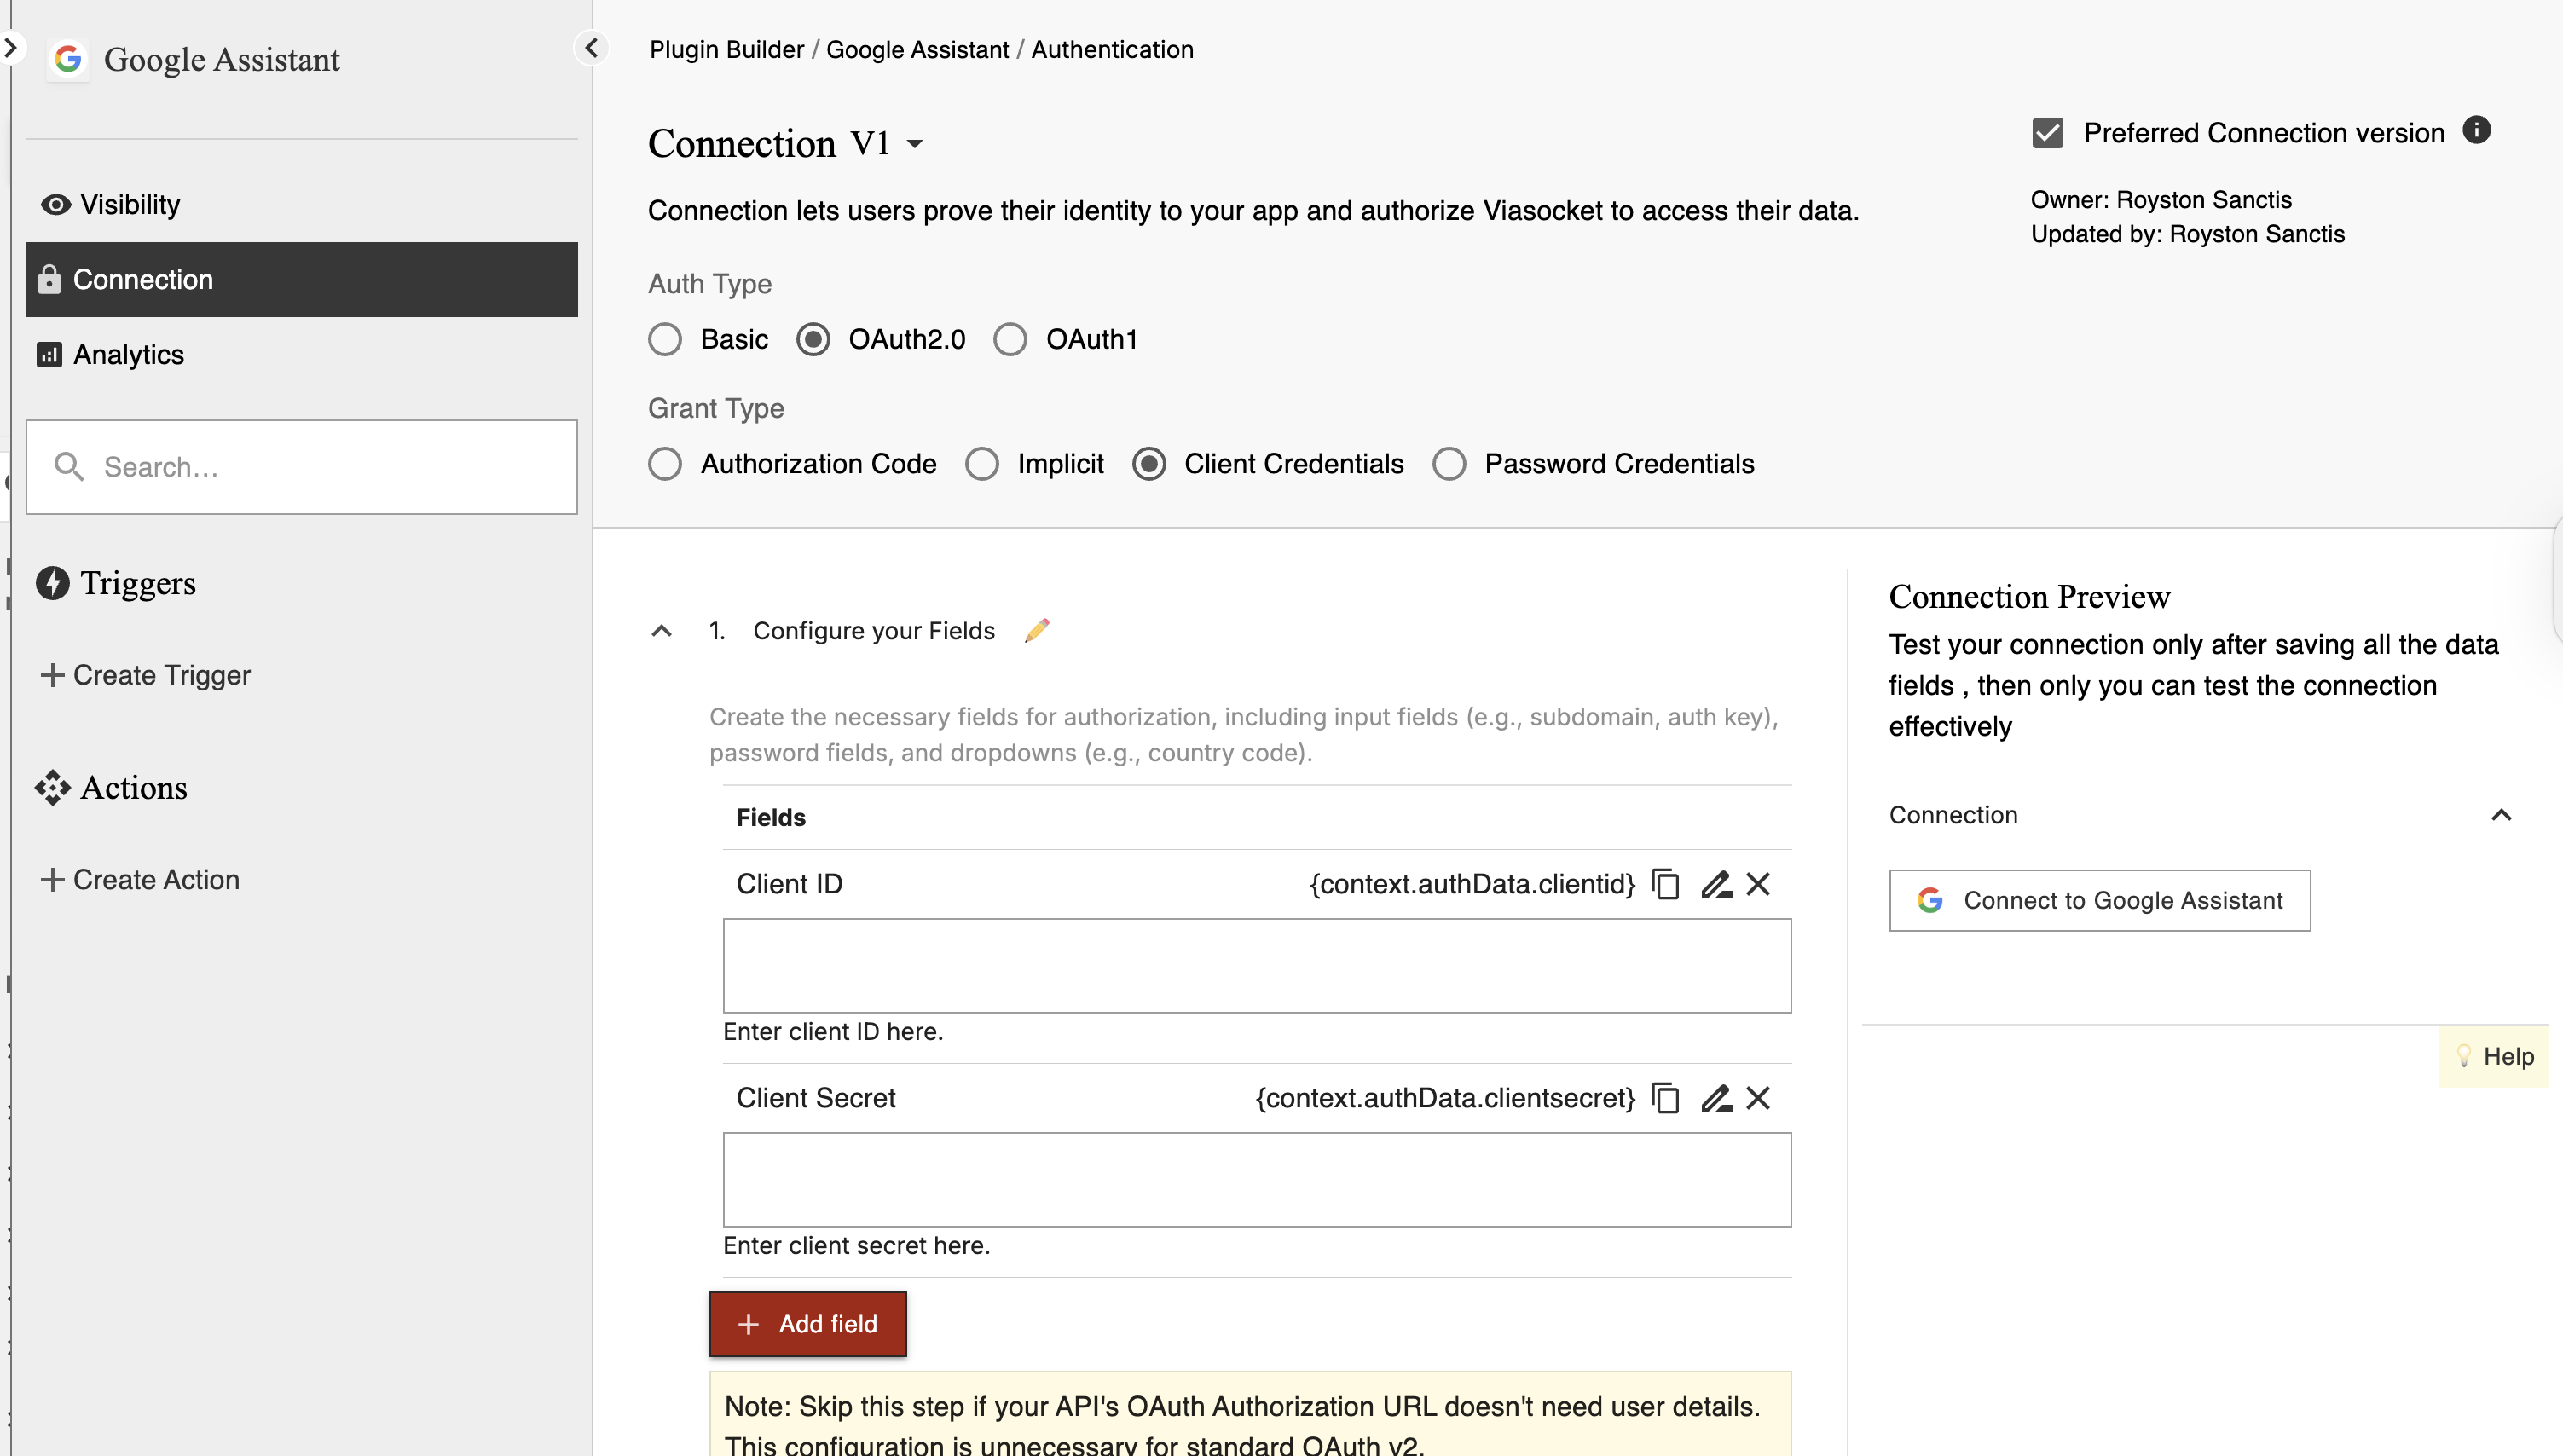
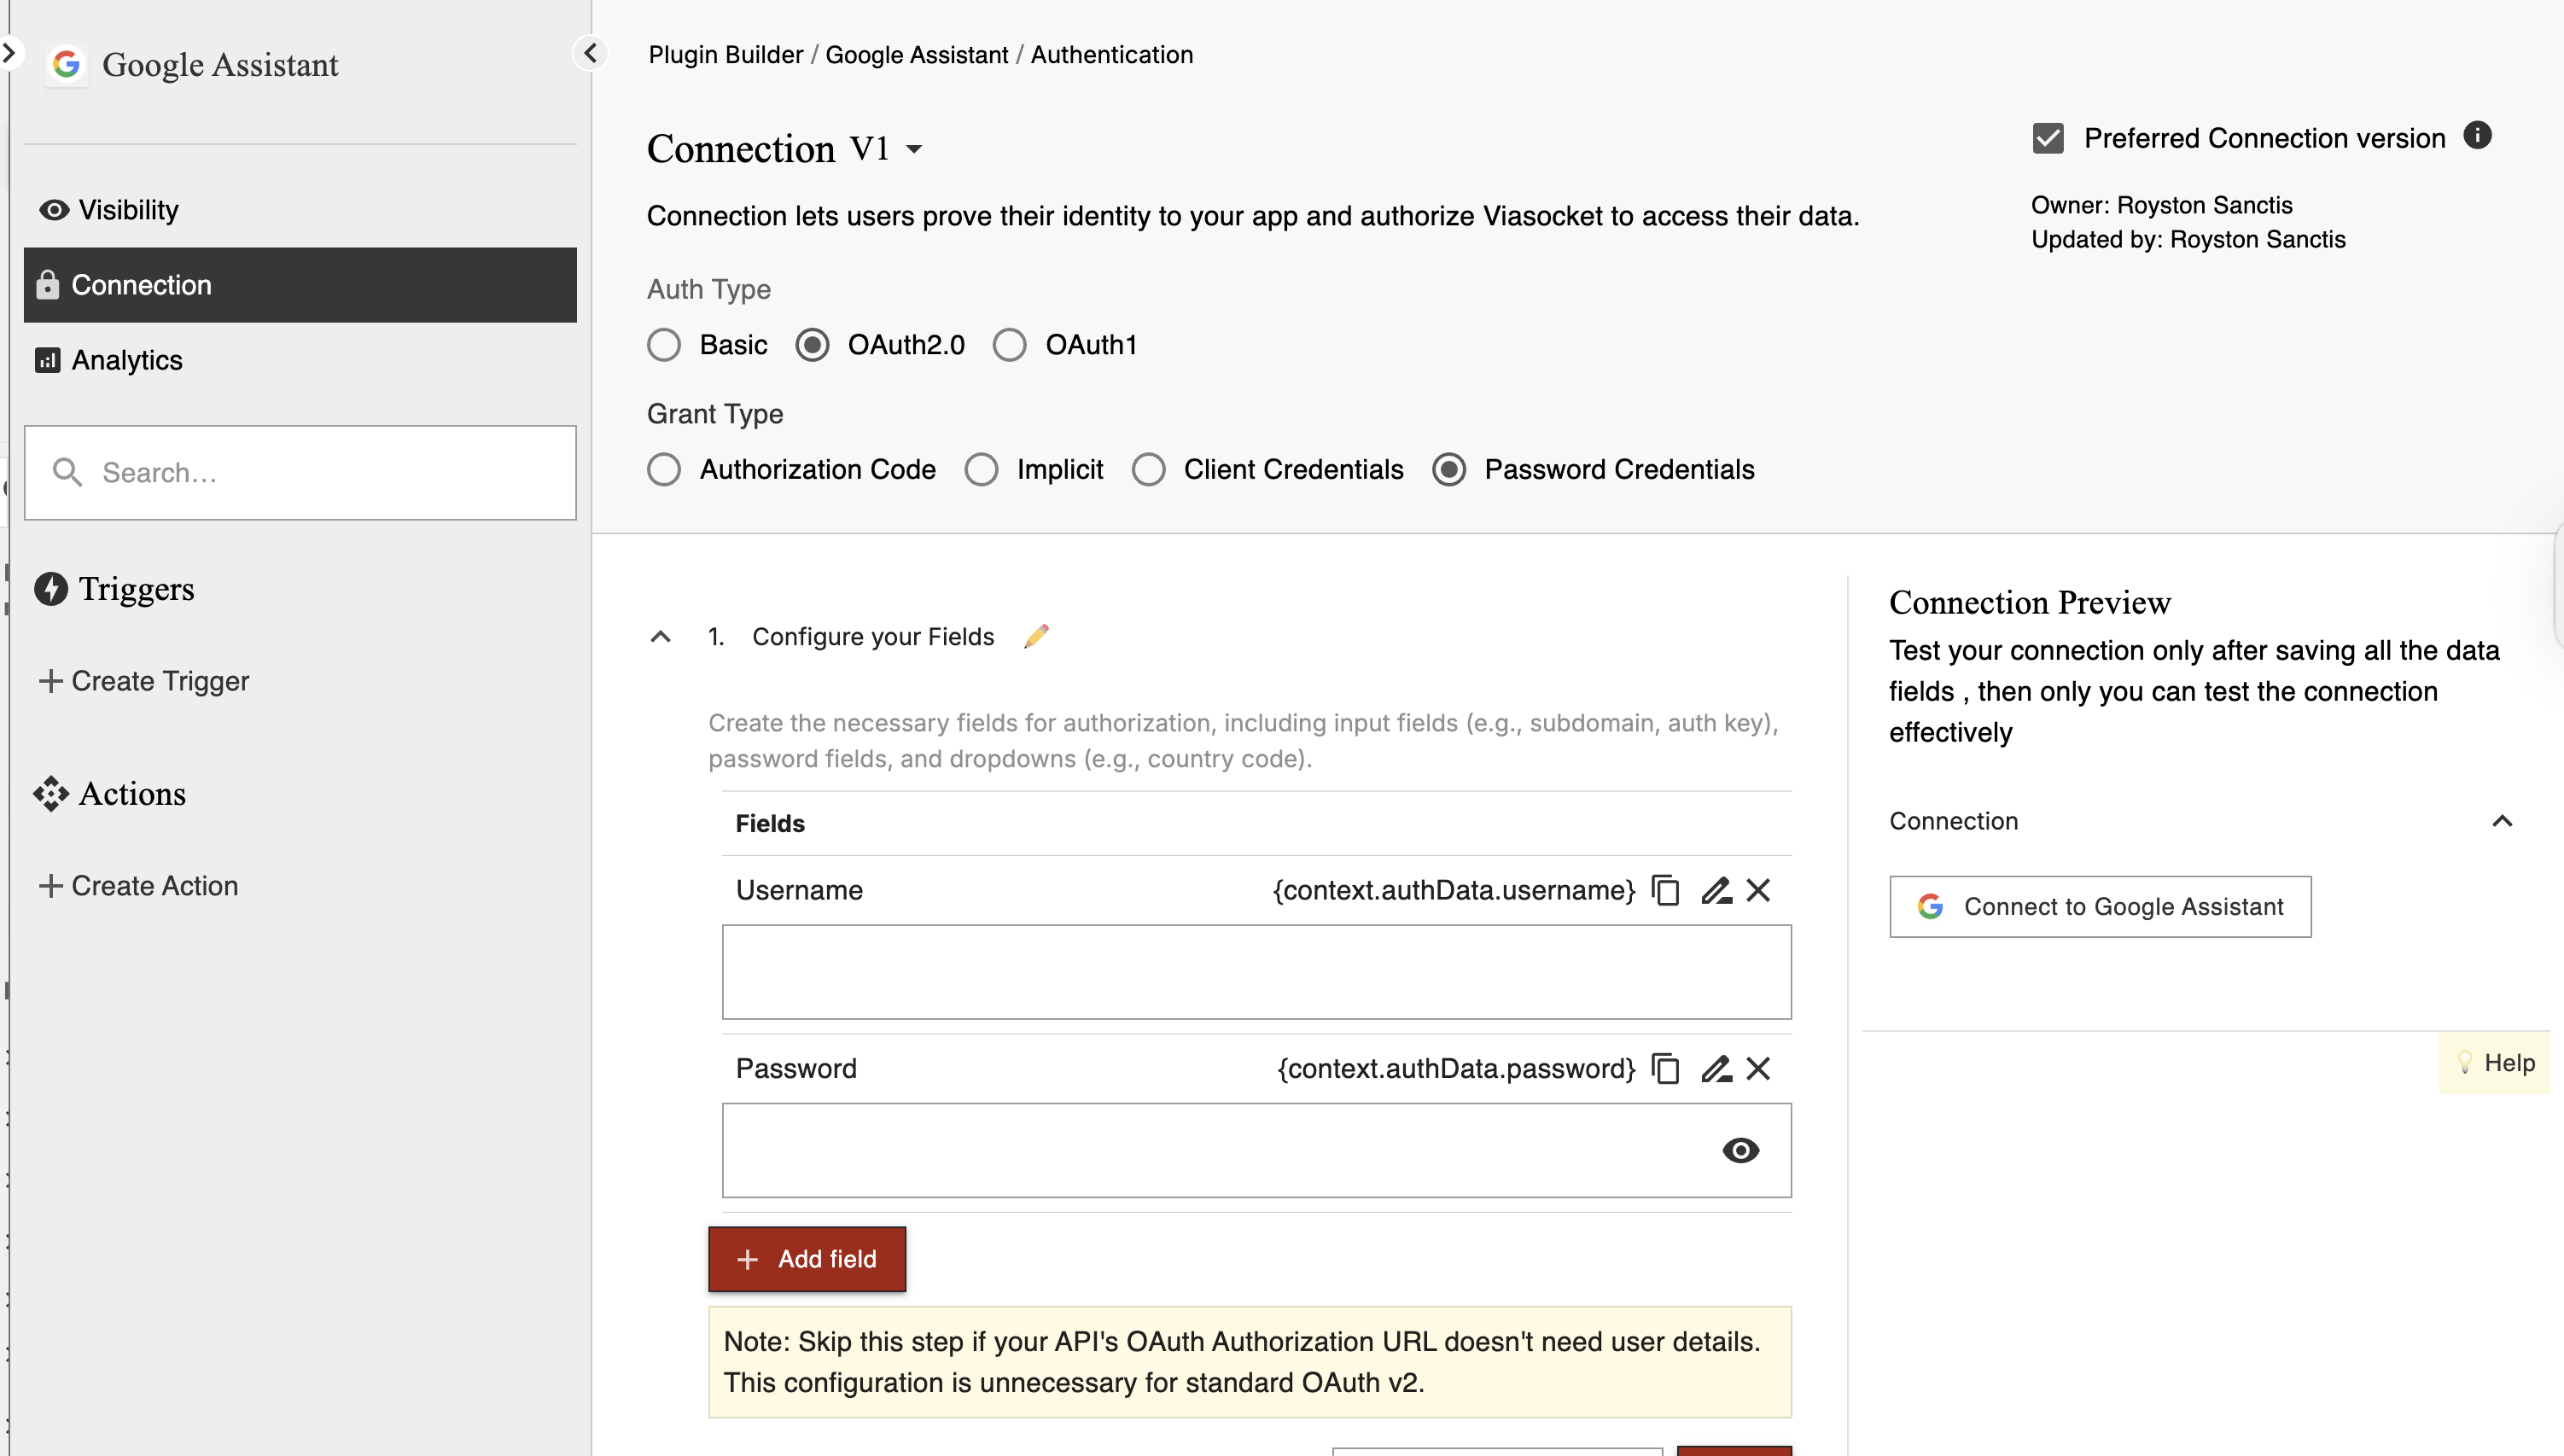
OAuth 2.0 (viaSocket supports the types of authentication in OAuth 2.0: Authorization Code, Implicit, Client Credentials, and Password Credentials.
Authentication Type | Use Case | Security Level | Recommended For |
|---|---|---|---|
No Auth | Public APIs, non-sensitive data | Low | Open data access |
Basic Auth | Internal services, quick testing | Medium | Internal applications, prototyping |
OAuth 2.0 | Third-party integrations, secure access | High | Most modern applications |