OAuth 2.0 – Implicit Grant Type
Purpose:
The Implicit Grant Type is designed mainly for browser-based or single-page apps (SPAs) where tokens are issued directly without a backend server exchanging an authorization code. It’s less secure because tokens are exposed in the URL and no refresh tokens are issued.
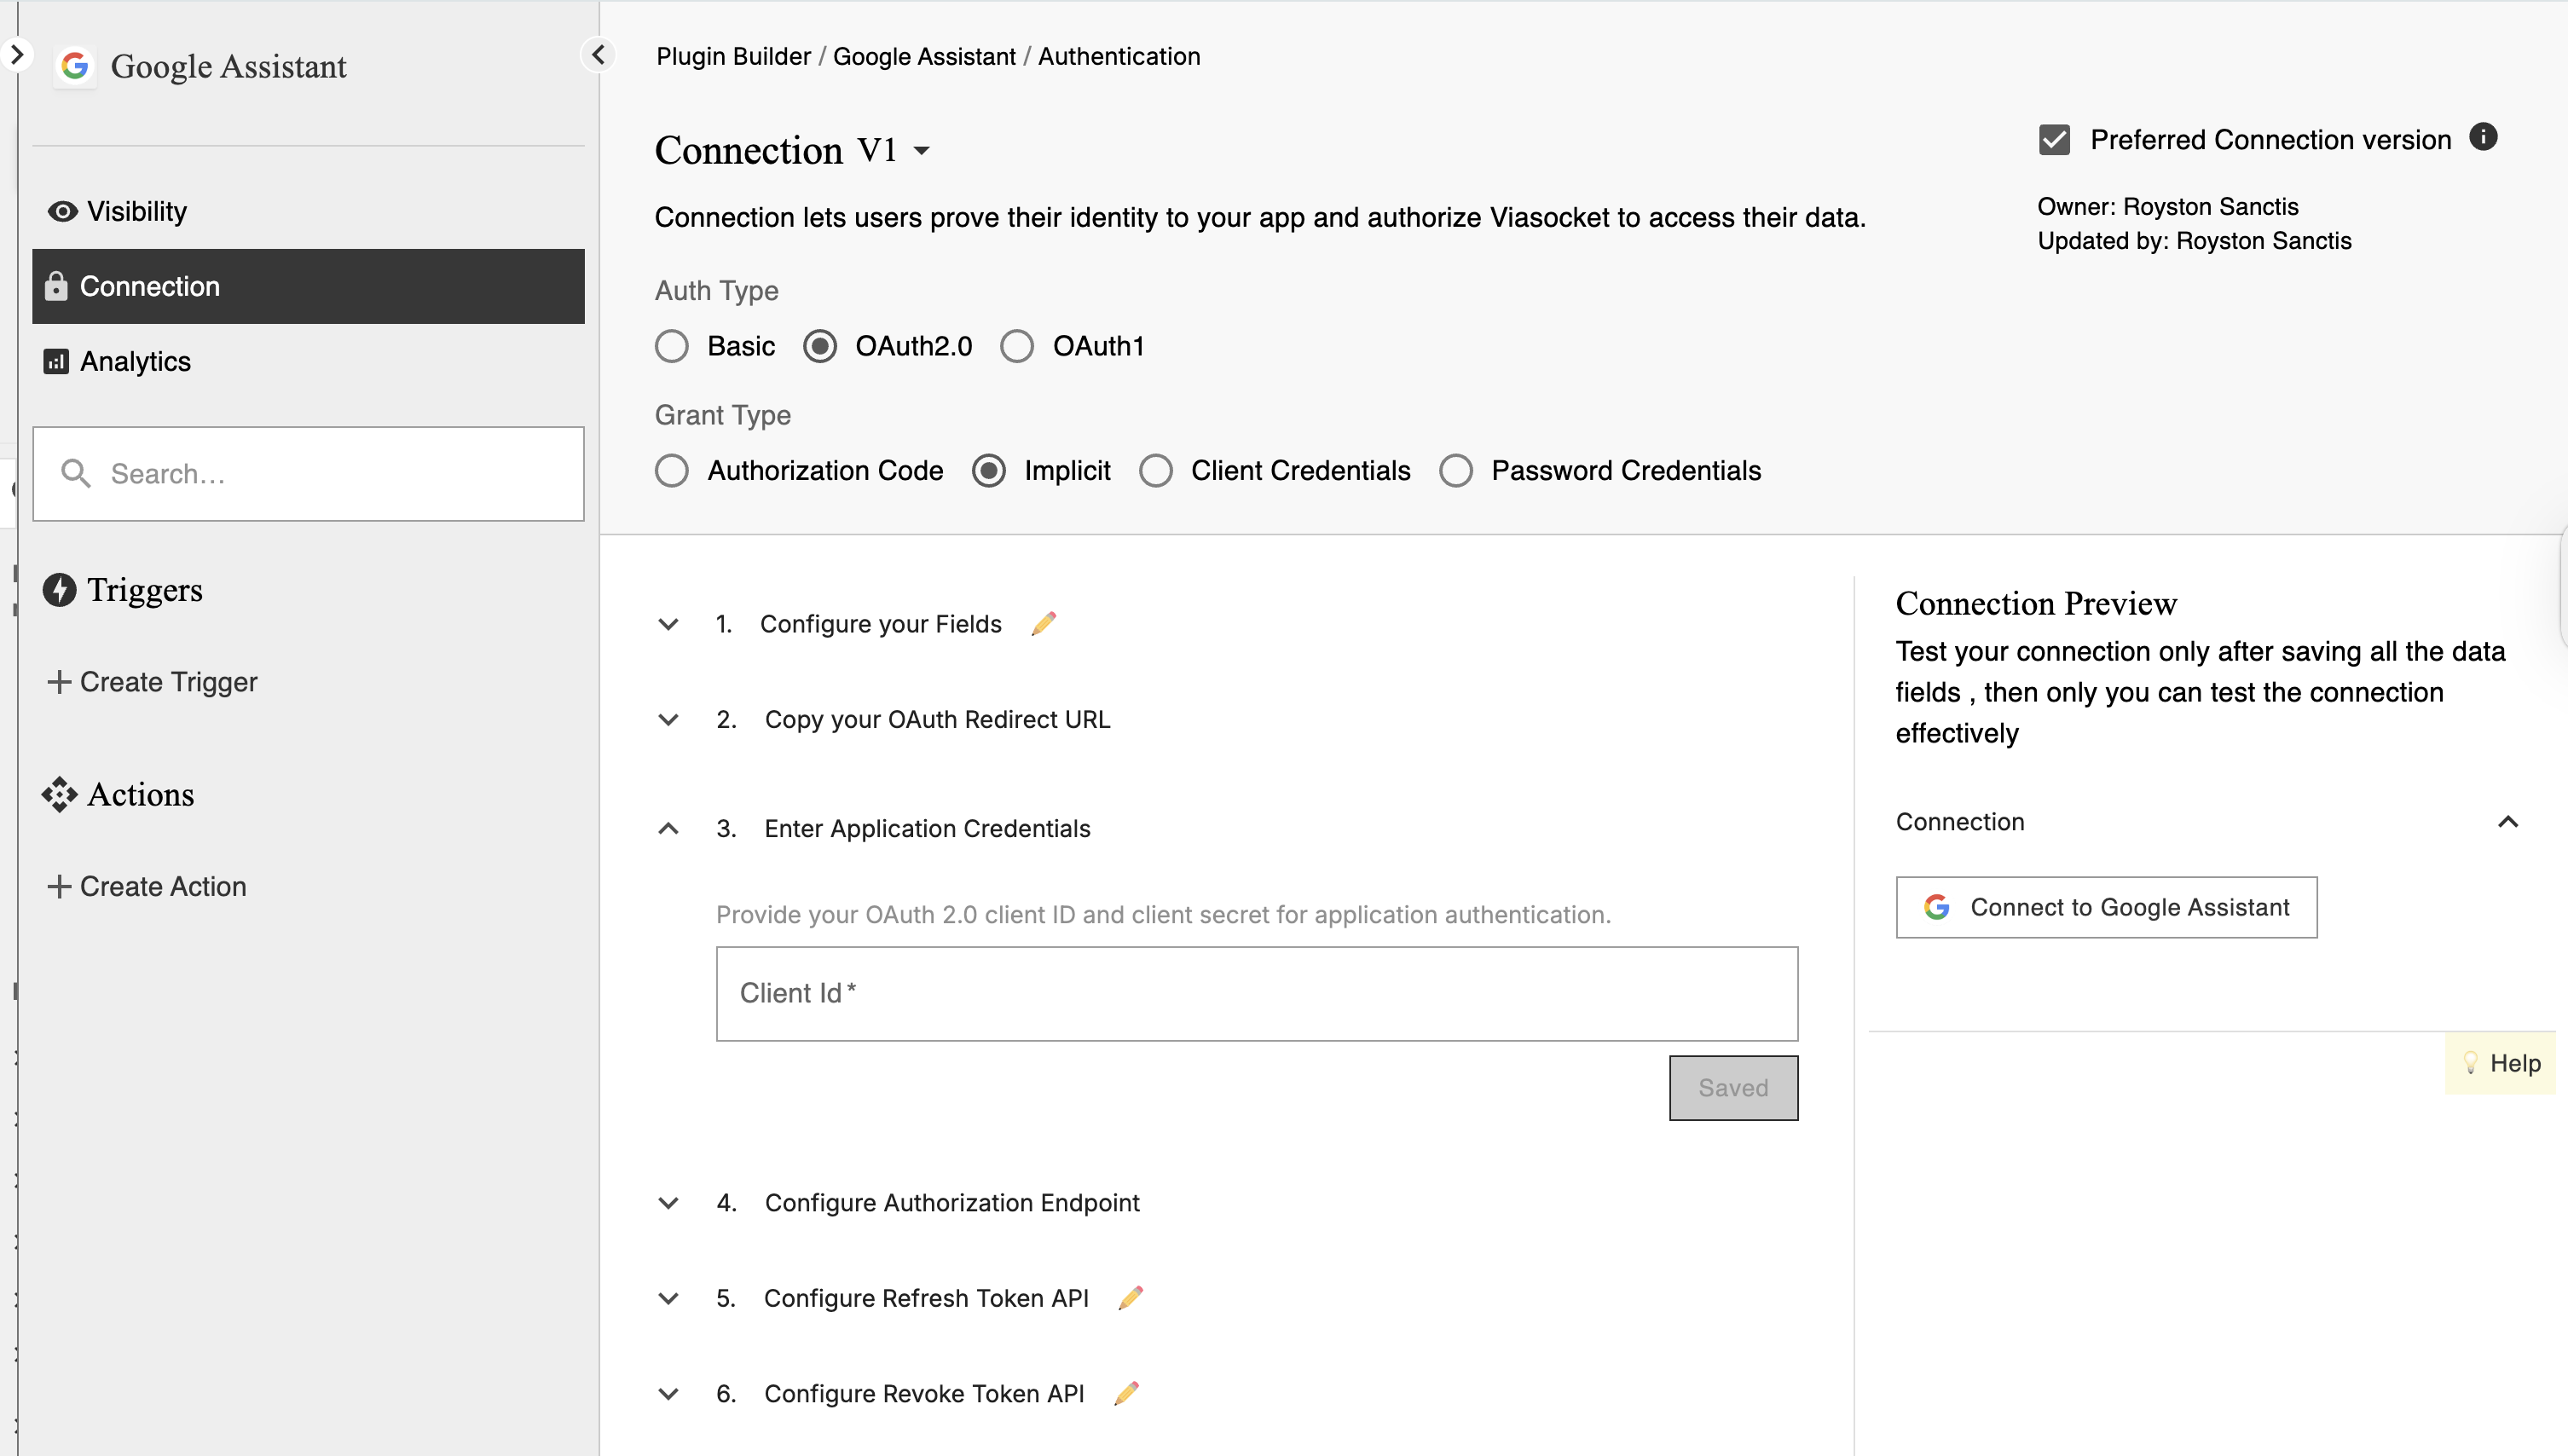
1. Configure Your Fields
Set any additional input fields needed for authentication.
Typically, Implicit Flow doesn’t require extra fields because user login happens directly with the provider.
Could include optional fields like region or API version if your integration requires them.
2. Copy Your OAuth Redirect URL
The callback URL where the external service will send the access token directly in the URL hash (#access_token=...).
Must match the redirect URL registered in the provider’s developer portal.
Tip: Since tokens appear in the browser, make sure the redirect URL is secure (HTTPS).
3. Enter Application Credentials
Add Client ID provided by the external service.
Note: Most implicit flows don’t require a client secret because the secret can’t be securely stored in browser code.
Tip: If the provider asks for a secret, you might be using the wrong flow — verify in their docs.
4. Configure Authorization Endpoint
The URL where the user is redirected to log in and approve permissions.
Example:
https://service.com/oauth/authorizeCommon parameters:
response_type=token(instead ofcode)client_idredirect_uriscopestate
Tip: Always use the
stateparameter to prevent CSRF attacks.
5. Configure Refresh Token API
Not applicable in most implicit flows.
Implicit flow typically doesn’t provide refresh tokens.
If you configure this, ensure the provider actually supports it for your chosen flow.
6. Configure Revoke Token API
Optional endpoint to invalidate tokens.
Helps maintain security by letting users disconnect manually.
Example:
https://service.com/oauth/revoke.
7. Configure Test (Me) API
An endpoint to confirm the token works and retrieve basic account info.
Example:
/meor/profile.Useful for building the Connection Label automatically.
8. Add Connection Label
A friendly name for the user’s saved connection.
Example:
John’s GitHub.Often uses dynamic data from the Test API.
9. Add URLs to Whitelist
List the API hostnames or endpoints that viaSocket can call with this connection.
Tip: Keep this minimal to reduce attack surface.
10. Add Unique Authentication Identifier
A unique value from the provider (like user_id or email) that identifies the authenticated account.
Prevents duplicate connections for the same user.
11. Set Request Parameters
Default query or body parameters for all requests.
Example:
api_version=3.Avoid storing sensitive values here — tokens are automatically handled by viaSocket.
Extra Best Practices
Security First: Since tokens are visible in browser URLs, always use HTTPS and consider clearing URLs after token retrieval.
Short-Lived Tokens: Expect short token lifetimes — this flow is not designed for long-term sessions.
Consider Alternatives: If possible, use the Authorization Code with PKCE flow for better security in SPAs.
Use Cases:
Single-page applications (SPAs).
Applications with limited backend capabilities.
Security Considerations:
Access token is exposed in the URL fragment, making it susceptible to interception.
Not recommended for applications handling sensitive data.
Considered less secure, its use is being deprecated in favor of Authorization Code with PKCE.