Email to Flow
Email to Flow lets you start a Workflow by sending or forwarding an email to its unique Flow email address.
When an email reaches the Flow email address, viaSocket receives the email and makes its data available to the Workflow steps.
Set Up Email to Flow
Step 1: Create a Workflow with an Email Trigger
Create a new Workflow.
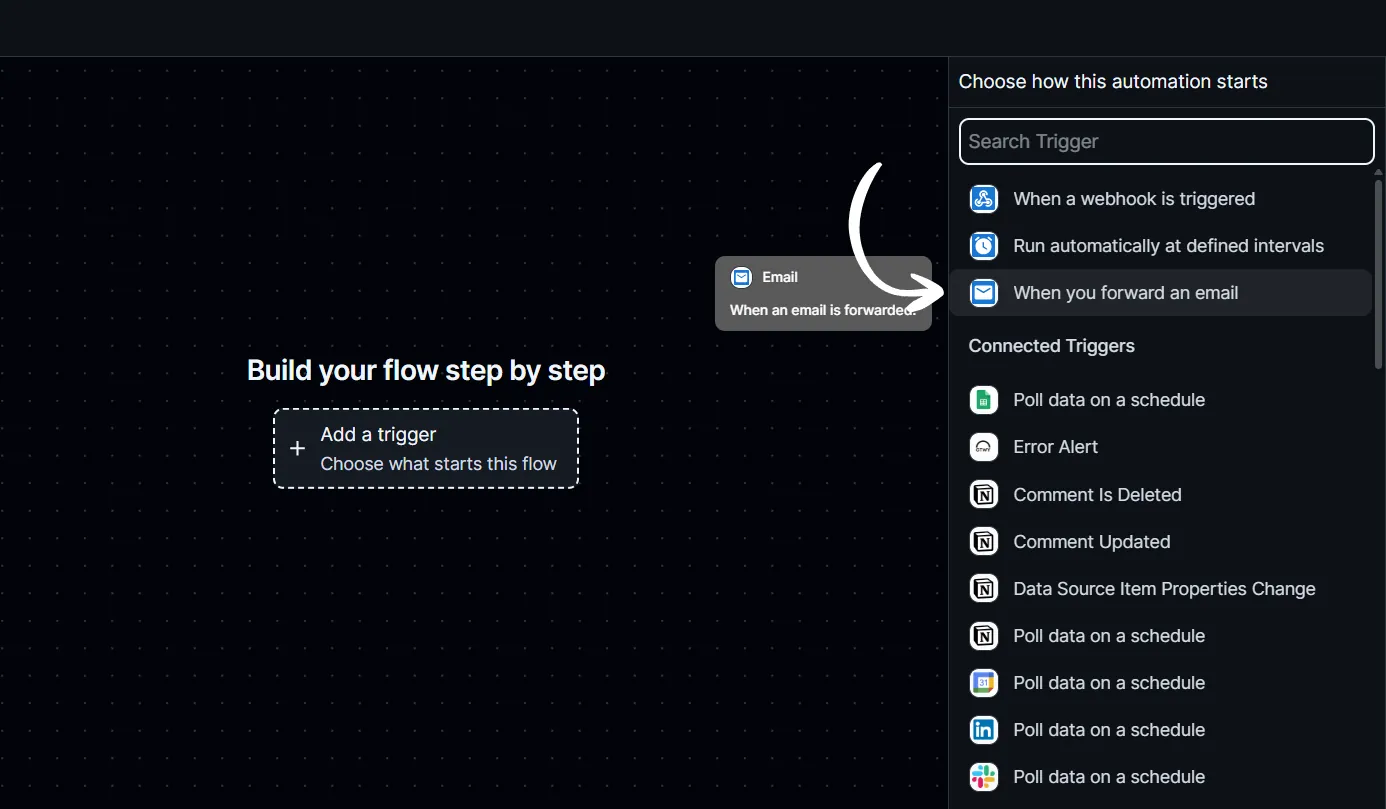
Click Add Trigger.
Select When you forward an email.
Step 2: Get the Flow Email Address
After selecting the Email Trigger, viaSocket provides a unique email address for the Workflow.
Copy the Flow email address.
Send an email to this address from your email account or service.
.webp)
View the Received Email
Once an email is sent to the Flow email address, viaSocket receives it and makes the email data available in the Workflow.
You can view the received data in the Flow Log/History.
Note: The Flow email address is unique to the Workflow.
Mail Forwarding
You can also use the Flow email address as a forwarding address in your email provider.
If your email provider requires forwarding-address verification:
Open the Flow Log/History in viaSocket.
Find the verification email or confirmation entry.
Open the confirmation link to approve the forwarding address.
After the forwarding address is approved, forwarded emails can reach your Workflow.
Use Email Data in Your Workflow
Once the email is received, you can use its data in subsequent Workflow steps.
For example, you can:
Extract information from the email.
Summarize the email content.
Classify incoming emails.
Send the extracted information to another app.
Take an automated action based on the email.
You can add an AI step when you need to understand or extract information from the email content.
Example
Email to Flow → AI → Google Sheets
An incoming email can be analyzed by AI, and the extracted information can then be added to Google Sheets.