ChatGPT MCP Integration
Connect ChatGPT to Mushrooms — viaSocket's MCP server platform — and give it the ability to act on 2,500+ apps like Google Sheets, Slack, Gmail, and HubSpot through a simple, secure connection. No extra code needed.
NOTE: ChatGPT only supports MCP tools in Developer Mode currently.
For Everyone on Paid ChatGPT Plans
Click "Create" to create a new connector.
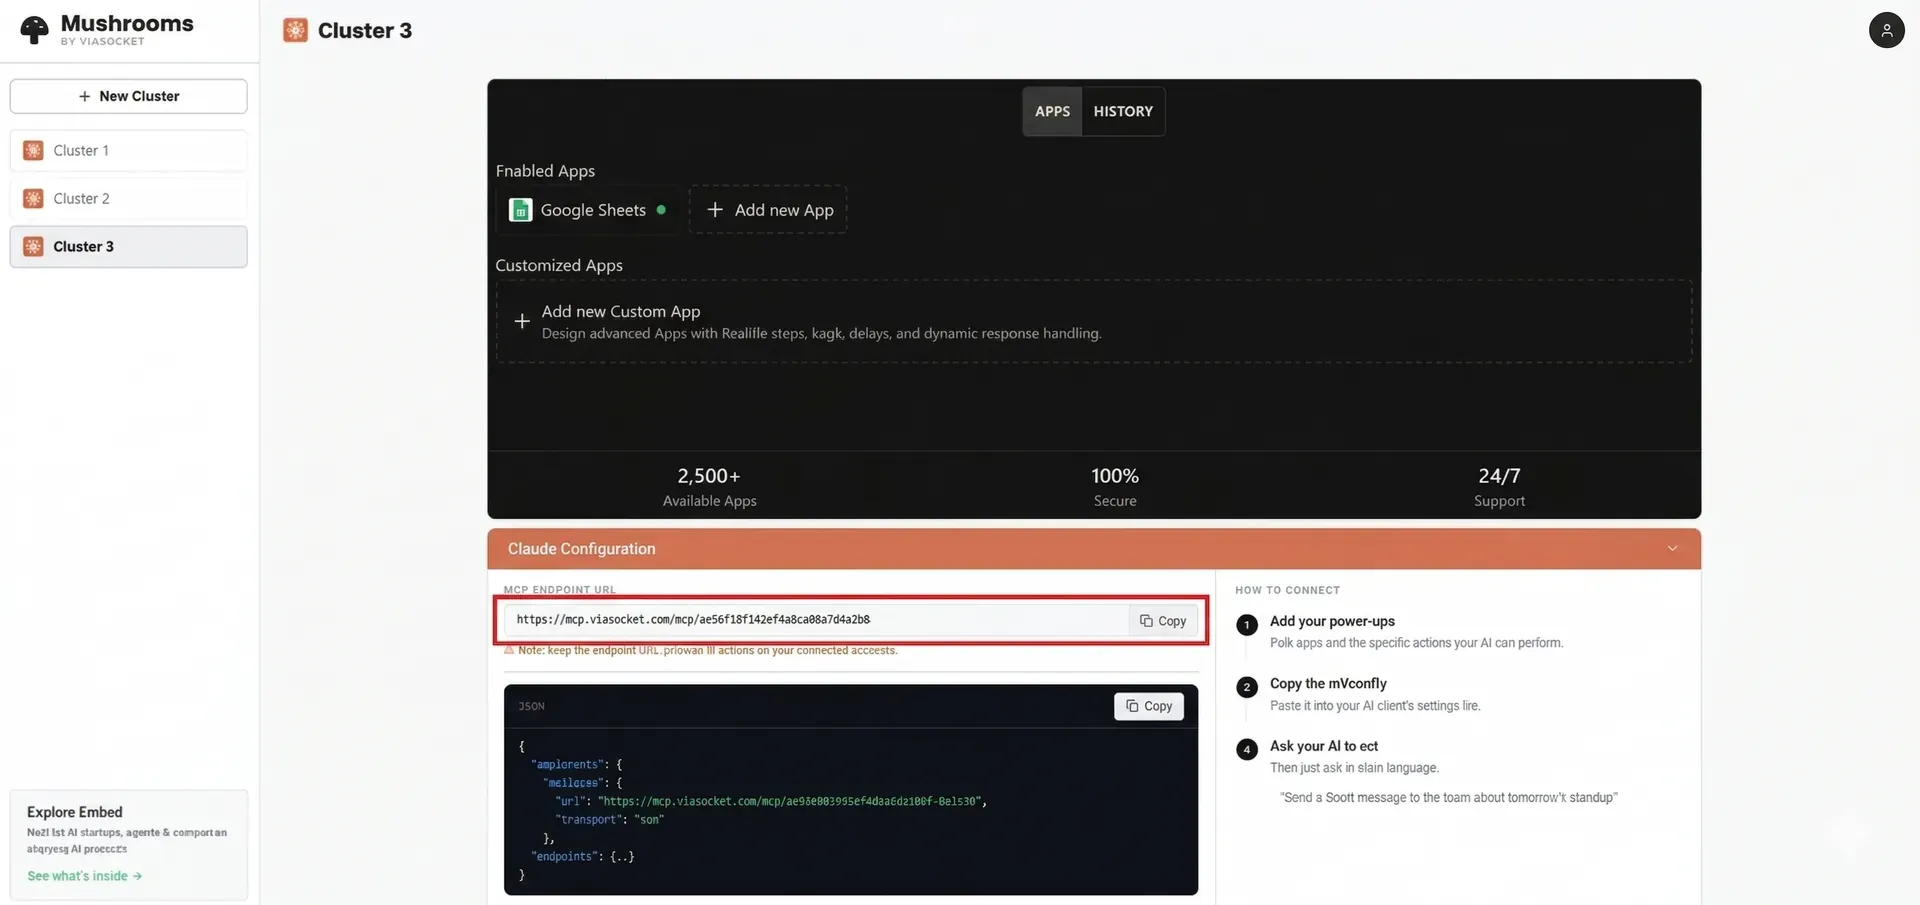
Paste in your Mushrooms MCP Endpoint URL — copy this from your cluster dashboard at mushroom.viasocket.com → Claude Configuration panel.
Use this viaSocket logo
Use this name: Mushrooms MCP
Use this description: Access user-connected mushrooms (apps) and perform actions via Mushrooms (check for available tools)
Set Authentication to No Auth and click "Create" to save.
Note: At least one tool needs to be configured in the viaSocket before setting up in the ChatGPT. If no tool is present, then the error is shown during setup.

ChatGPT does not automatically refresh the available tools. If you add/edit/remove tools in your viaSocket ChatGPT MCP Server, go to ChatGPT Connector Settings, select the viaSocket Connector, and click "Refresh".

Example Usage
Once connected, ChatGPT can act on your mushrooms (apps) through natural conversation. Here are some real-world examples:
Productivity & data:
"Add a new row to my Pipeline sheet — company Acme Corp, stage Demo, owner Ravi."
"Look up all rows in my Leads sheet where status is Pending."
Communication:
"Send a Slack message to #sales: the Acme call is confirmed for Thursday 3pm."
"Draft and send a Gmail to [email protected] with our onboarding guide link."
CRM & tracking:
"Create a new HubSpot contact — name Sara Khan, email [email protected], source Website."
"Update the deal stage for Acme Corp to Proposal Sent in HubSpot."
ChatGPT will call the right Mushrooms tool automatically and confirm the result in the chat.
Additional Steps for Admins of ChatGPT Business/Enterprise Accounts
Before following these steps, ensure that the viaSocket organization selected in the bottom left of your Mushrooms cluster dashboard is the one users of your ChatGPT workspace are also a part of.
To enable Mushrooms MCP for your ChatGPT workspace, go to the Admin Connectors page and click "My Connectors".
Click "Create a connector".
Follow steps 3–7 above
Select the "Publish to Workspace" option for the viaSocket MCP connector
Individual employees can now see the viaSocket MCP connector. When selected, it will connect to the same viaSocket organization you used, and each user will be able to set up and use their own Apps within their cluster.
Caution: Treat your MCP Endpoint URL like a password. It authorises actions on all your connected accounts. Do not share it publicly or commit it to version control.